
Plaster Repair in The Woodlands, TX | The Woodlands Drywall Co.
The Woodlands Drywall Co. has provided plaster repair for homeowners, property owners and property managers in The Woodlands, Texas for 20 years. If a patch on one of your plaster walls keeps coming loose, the finish is rarely the cause. Plaster is not gypsum board, and plaster wall repair requires a different approach from a drywall patch.
We repair two kinds of plaster wall. Lath and plaster is the older construction, where wet plaster was pressed over thin wood strips called wood lath and squeezed through the gaps to form gripping ridges known as plaster keys. Veneer plaster is a thin, hard coat applied over blueboard, a gypsum panel made to accept it. Either type can crumble at the surface, and either can separate from the material behind it while still looking sound.
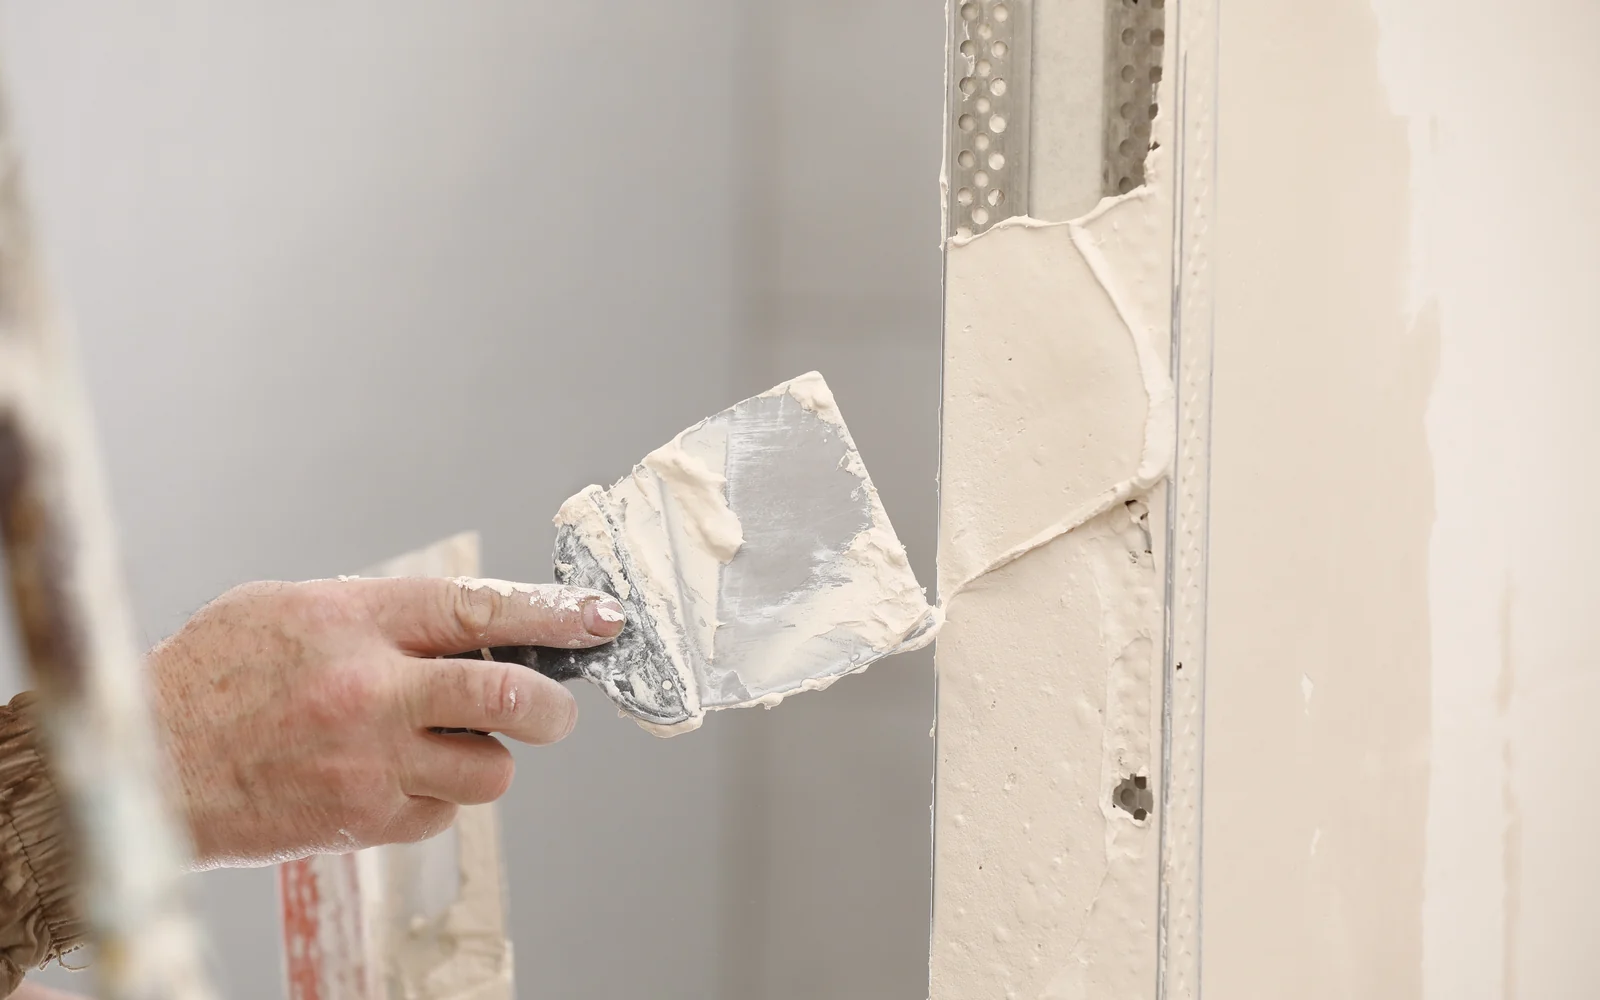
Our lath and plaster repair work includes plaster washers, the small discs used to pull a loose field back tight, bonding agent that helps new material grip the old surface, and the skim coat that finishes the face. We also repair plaster-to-drywall transitions in remodeled rooms, where the two wall types meet at different thicknesses.
Before we mix anything, we determine which layer has failed. A tap test and a moisture meter reveal what a visual inspection cannot, and we use setting-type compound where the depth or a damp schedule requires it, together with a bonding agent meeting ASTM C631. Plaster runs about 7/8 inch over lath compared with 1/2-inch board, so the depth alone rules out a quick skim.
Gypsum board repair, crack diagnosis and deep texture work are separate services, and we quote each one separately. We work throughout The Woodlands, with lath and plaster found most often in the older Montgomery County communities around it rather than in the villages themselves. What you get back is a wall that has been stabilized and rebuilt, not simply skimmed over to hide the problem. Call us at (346) 248-4075 for a free on-site look and an itemized written quote within 24 hours.
Get A Free Quote
How Plaster Fails, and Why It Is Not Drywall
A plaster wall is built up wet, coat by coat, over a backing fixed to the studs, then hardens in place into one continuous slab. Gypsum board arrives as a finished panel and is screwed on dry. That difference determines how each wall fails and what plaster wall repair has to correct. When a manufactured panel is damaged, the problem is where you see it, and gypsum board repair is a separate service we offer. Plaster damage is usually limited to one of several layers, so the surface you see may not be the layer that actually failed. The five entries below explain the ways plaster walls come apart, with each one leading to a different repair.
Before that, one term appears throughout. The field is the broad area of plaster between its edges, away from corners, openings and the perimeter. We record where a crack sits and the direction it runs as a clue, not a verdict. This work does not determine whether movement in the framing or foundation is the cause, and we say so when a wall shows signs that point in that direction.
Three-Coat Plaster Over Wood Lath
Wood lath is made of thin wooden strips nailed horizontally across the studs, with gaps of roughly three-eighths of an inch between them. The scratch coat goes on first, pressed on firmly enough to squeeze through those gaps. The brown coat comes next, building the wall to its full thickness and creating a flat, true surface. The finish coat goes on last, forming the smooth white face you see and touch, thinner than a sheet of card.
Together, three-coat plaster reaches about seven-eighths of an inch in thickness, compared with half an inch for standard gypsum board. That three-eighths-inch difference is why old walls feel so solid and why a drywall patch never sits flush in one. Some later homes used rock lath, a gypsum backing board, instead of wooden strips, with the plaster over it applied in the same way.
When the Keys Break
The scratch coat that squeezed through the lath gaps hardened behind the strips into rows of hooks called plaster keys, and those keys are the only thing attaching the plaster to the lath. Hair mixed into the basecoat knits the slab together across its width, which is why a wall can sound hollow in places and still remain standing.
Plaster keys break over time. Slammed doors, a passing truck, a floor above working under load, and years of the wall holding its own weight can snap them a few at a time. Nothing appears on the surface because the finish coat is still intact and the plaster slab is holding itself up. You can check for loose plaster yourself by pressing flat-handed against the wall and working across it, tapping as you go. Sound plaster answers with a dull tap and does not move. An area that sounds hollow, or gives slightly under your palm and springs back, has lost its keys behind the surface.
Crumbling, Chalky and Delaminating Coats
The coats themselves can fail even while the keys remain sound. Delaminating plaster happens when the finish coat separates from the brown coat beneath it, lifting away in sheets that can look like peeling paint at first. Check the back of a piece that has come loose: paint is only a film, while this is plaster.
Free Quote Form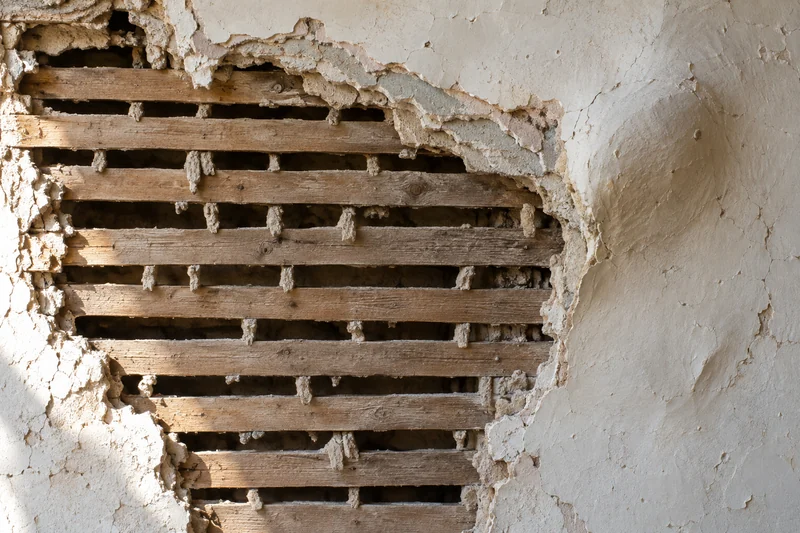
Crumbling plaster is a different problem. If the material rubs away chalky under your thumb, it has softened all the way through rather than failing only at the surface, so there is nothing sound left to repair onto. We probe the area to find the depth where the plaster becomes firm again. Sound plaster beneath a failed finish is recoated, while soft material is removed back to a solid base before plaster restoration begins. If water caused the damage and the source is still active, the wall is not ready for plaster work at all, and we will tell you that before quoting the job.
Veneer Plaster Over Blueboard, the Newer Plaster Wall
Veneer plaster is a single hard coat, about a sixteenth of an inch thick, spread over blueboard. Blueboard is a gypsum panel with a face designed to grip plaster rather than take paint. There are no keys or lath in this system because the plaster bonds directly to the panel face. The finished surface is harder than a taped drywall finish and chips at an edge where drywall would dent.
You can tell which type of wall you have. Veneer plaster sounds hollow across the entire surface rather than in isolated patches because the panel spans between studs, and your thumbnail will not mark it. Repairing this wall means bonding fresh material to the panel face, not re-anchoring anything.
Where Plaster Meets Drywall in a Remodeled Room
A partly remodeled room can leave you with a mixed wall. An earlier repair may have removed a section of plaster and replaced it with half-inch board, leaving that board three-eighths of an inch below the surrounding plaster. Paint and light both catch the height difference, so the joint shows as a ridge that sanding will not remove.
There are three ways to close that gap. Shims behind the panel pack it out to the plaster plane, a second thin layer over the face builds it up from the front, and a three-eighths-inch layer laminated over the board makes up the difference exactly. Once the two surfaces are level, we tape the joint and float the compound wide, feathering it far enough on both sides that the change of plane disappears under paint. That is the plaster to drywall work behind a transition blending job, and the width of the float is what makes the repair disappear.
Repairing Plaster Without Replacing the Wall
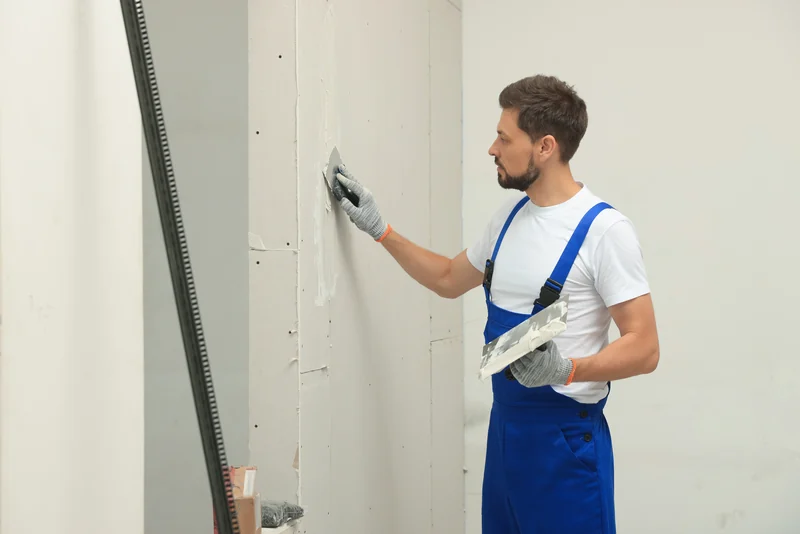
Plaster repair follows the same order on every wall we work on: hold it, bond it, build it, match it. Anything loose is fastened back to the wood strips behind it first, because fresh material will not hold to a surface that still moves. Once the area is secure, we prepare it so the new plaster grips properly, then rebuild the missing depth in layers until it matches the thickness of the original wall. The final thin pass is shaped level with the surrounding surface. We replace a section only when there is nothing firm left to fasten to, which is rarer than most owners expect. Plaster patching that preserves the original wall costs far less than tearing it out.
Plaster Washers and Re-Anchoring a Loose Field
A plaster washer is a small metal disc, about the size of a quarter, with holes punched through it and a dished center for a screw. The screw passes through the plaster and into the wood lath or stud behind it, while the disc spreads the pull across a wider area of plaster rather than concentrating it under a single screw head. Without the washer, the screw head punches straight through old plaster and holds nothing.
We set washers in a ring around the edge of the loose plaster first, then work inward so the field is drawn back gradually instead of snapping at one point. Each screw is driven until the washer sits slightly below the surrounding surface, deep enough for the patching layers to cover it completely. All of this is done before any filling begins, so no washer remains visible on the finished wall.
Bonding Agent, and Why Plaster Will Not Just Stick
Old plaster can be dusty, dense or sealed, which leaves fresh material with little to grip. A bonding agent is a liquid we brush or roll over the prepared area to create that grip, and ASTM C631 is the published specification for bonding compounds used in interior plastering. The product has clear limits: it cannot bond through a paint film, so flaking or peeling paint is scraped back to a sound edge first, and it cannot secure plaster that is still loose, which is why the washers go in before anything is applied. On a clean, firm surface, strong plaster adhesion is what keeps the patch from releasing a year later.
Building the Surface Back in Layers
A deep hole is never filled in a single pass. Plaster and compound both shrink as they harden, so one thick fill pulls away from itself and cracks through the middle.
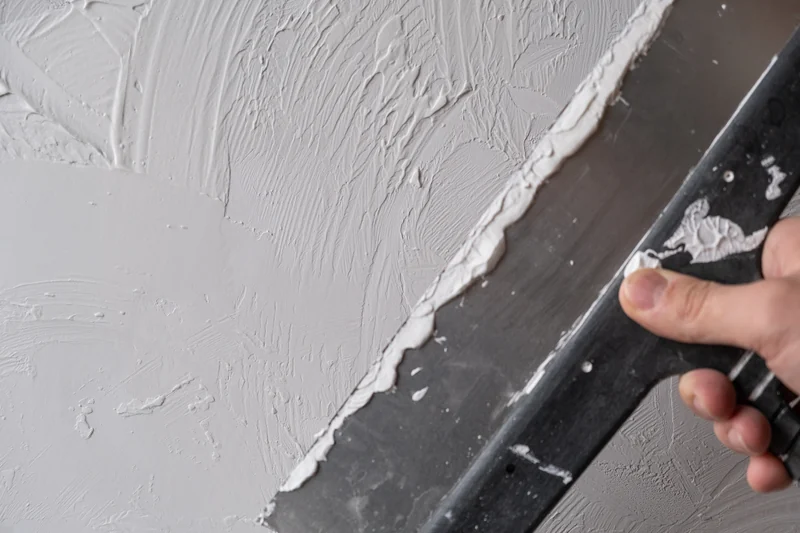
We rebuild the area in layers to the full thickness of the original plaster rather than stopping at the thinner drywall plane. The lower layers are rough, using the same kind of material as the scratch coat and brown coat already in your wall, and we score shallow lines across each one so the next layer can lock into it. The final pass is a thin, smooth skim coat plaster layer shaped to match the surrounding wall. Each layer must harden before the next goes on, and that set time is built into your schedule.
Drywall Compound on Plaster, and When It Is Wrong
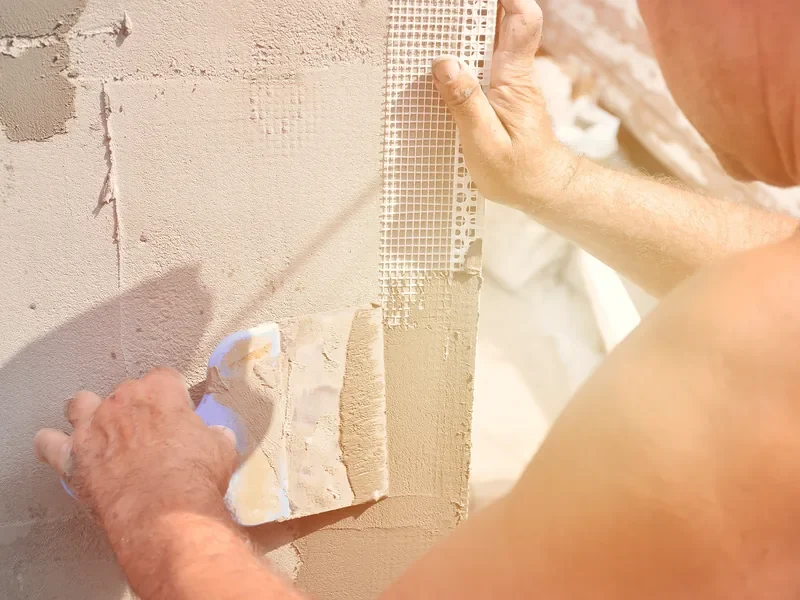
Two products sit side by side at the store but harden in completely different ways. Ready-mixed joint compound is sold wet in a bucket and stiffens as it dries, losing volume as the water leaves. Setting-type compound comes as a powder mixed with water and hardens through a chemical reaction that holds its volume. On a sound, shallow surface, ready-mix is the right choice and works well for a thin smoothing layer. In a deep plaster void, that same product shrinks, cracks and sinks, sometimes months after the repair looked finished. The depth of the hole and whether the wall still moves determine which product belongs there, not the brand on the label.
Cracks in a Plaster Wall, and Where the Repair Stops
A hairline crack filled flush will reopen along the same line. We open it slightly first so the filler has a shoulder to grip, lay mesh tape across it, then spread the compound in wide, thinning passes on both sides until the ridge disappears from every viewing angle.
Fine cracks that spread in a network across a finish coat are a surface condition and are repaired the same way. Some cracks can warrant evaluation by another qualified professional before plaster crack repair begins, including cracked plaster that is wide, returns after being patched, or has one side sitting higher than the other. We will tell you when we believe you are looking at one of those cases, but we do not claim that a crack pattern proves anything about your structure.
Why Choose The Woodlands Drywall Co. for Plaster Repair
Plaster is its own kind of wall, and we treat it that way instead of approaching it like failed drywall. Plaster repair on a wall built up in coats behaves differently from a patch in gypsum board, so we begin by finding which part of the wall has actually failed. A surface that is chalky or breaking away at the face is one problem, while a field that has pulled loose from what holds it is another, and each requires different work at a different cost.
We take a moisture meter reading to find out whether the wall is still damp behind the surface, because a repair made over a wet field will fail again. You get that answer before we attach a price to the work.
The rest of how we work in your house comes from knowing these are rooms you are still living in.
- The person who prices your job also runs the crew that completes it, so nothing gets lost between the walk-through and the work.
- We hang dust containment barriers and sand with a vacuum held directly at the surface, keeping plaster dust out of the rest of your house.
- We choose the material to match the depth of your repair, so a deep fill does not shrink back months later.
As an insured drywall contractor we carry full insurance for both residential and commercial projects, and we have served The Woodlands, Texas for 20 years. Your itemized written quote follows the visit, and financing is available for qualifying work. Call (346) 248-4075 or use our quote form to book your free on-site look at the wall.
What Plaster Repair Costs
Plaster repair cost is determined by what is happening behind the surface, not by what you can see on it. A hole the size of a dinner plate can sit in a wall that is otherwise firm, while a hairline mark can appear above an entire panel that has pulled away from the wood behind it. Sounding the wall shows us where the plaster is still secure and where it has let go, and that boundary, not the size of the visible mark, determines the work.
A field that is sound and only needs a fresh finish coat is a smaller job than one that must be pulled back tight and re-anchored before any new material is applied. The depth of the failure adds to the work as well. A break through the full plaster thickness has to be rebuilt with the rough lower layers first and a finish layer last, with each one firming up before the next goes on. That turns depth into days on site.
Ceilings take longer than the same area on a wall because the work is done overhead against gravity from a platform. A finish that has been on an older wall for decades also takes more time to match at the end.
What Makes One Plaster Repair Cost More Than Another
Six things affect the price of your wall, and they all point in the same direction: the more of the wall that is involved and the harder it is to reach, the longer the work takes.
- How much of the field is loose behind the surface, based on sounding rather than the size of the visible damage.
- Whether the failure is limited to the finish coat or extends through the full depth of the plaster.
- Whether the repair is on a ceiling, since ceiling work takes longer than wall work covering the same area.
- How closely the repaired surface needs to match the surrounding texture.
- How easy the area is to access, including furniture that must be moved, stairwells, and the high walls common in older rooms.
- Whether the room remains in use while the coats cure, which spreads the work across more visits.
Repairing the Wall Against Covering It Over
You are weighing two options. Repairing keeps the original wall and its full thickness, and where enough plaster still grips the lath, plaster restoration is the smaller job.
Covering the old surface with gypsum board avoids the patching, but it pushes the wall out at every door casing, window and baseboard, which means the trim has to be reset or built out to meet the new surface. Once too little of the field is still holding, the two options cost about the same because the wall has to be rebuilt either way. If your wall genuinely falls between those choices, we can price repair or replace plaster side by side so you can compare them, and the itemized quote separates the plaster work from anything optional so you can see exactly what you are paying for.
Book your free on-site estimate by calling (346) 248-4075 or using our quote form, where your plaster repair estimate is finalized.
Plaster Assessment, Patch and Match in The Woodlands, Texas
The Woodlands Drywall Co. handles plaster repair in five steps, from your first call through to handing the room back to you. Each step ends with something you can see or read, and we do not open up any part of your wall until you have a written price in front of you and have agreed to it. Here is the order our plaster repair process follows:
-
Tell Us What the Wall Is Doing
You describe the damage and send us photographs.
The first call covers where the damage is, how far it spreads and how the wall responds when you touch it. Tell us which room it is in, roughly how large the damaged area is, and whether the surface gives or shifts under your hand. Send photographs of the same area taken straight on and from an angle, and we can give you an initial range before anyone drives out. Let us know as well if the room has to stay in use while we work, since that changes how we protect the space and schedule the visits.
-
The On-Site Look
We visit your property, test the wall and mark the area that needs repair.
The on-site estimate is free, and it is where the guesswork ends. We tap across the surface and listen: plaster that is still firmly attached sounds solid, while a hollow note shows where the field has pulled away. We take a moisture reading while you are there with us, because a wall that is still wet cannot be closed up. Then we mark the repair boundary on the wall with you present, so you can see exactly how much of the surface we plan to open.
-
The Itemized Quote
You receive an itemized written quote within 24 hours.
Your written quote arrives within 24 hours of the visit. Your quote lists labor, materials and any optional work on separate lines, so you can see what each part of the job costs and decline anything you do not want. The quote also identifies the texture we will match, so the finished surface is agreed before work begins rather than judged afterward. There is no national scale for grading a troweled plaster finish the way there is for drywall, which is why we put the match in writing instead of quoting a number.
-
Stabilize, Then Build Back
We protect the room, secure the loose plaster and rebuild the surface in coats.
Before anything is disturbed, we seal the work area with dust containment barriers and cover your floors and furnishings. We then anchor the loose plaster back to the lath, and only after it is secure do we rebuild the missing surface in coats. Each coat is given its full set time before the next goes on, following the schedule already committed to in your quote.
-
Match, Clean Up and Walk Through
We finish the repair, clean the room and walk the completed work with you.
The repair is finished to the texture named in your quote. Our vacuum-assisted sanding pulls dust away at the head of the tool instead of letting it settle through your rooms, and we seal the new plaster with PVA primer so paint takes evenly across the old surface and the repair. Before you sign off, we hold a light almost flat against the wall with you, which casts a shadow across any ridge or hollow left behind and reveals what an overhead lamp would hide. Finish painting is optional and appears on its own line in the quote, so you can take it or leave it.
To start with step one, call us at (346) 248-4075 or send us the details through our quote form.
Plaster Ceilings and the Weight Overhead
A plaster ceiling carries its full weight overhead, with nothing but the plaster keys holding it to the lath. On a wall, gravity presses the plaster against the lath it was spread over; on a ceiling, gravity pulls it straight down and away. That difference changes how the same failures behave. A wall can lose a large share of its keys and remain flat for years because the wall is still supporting itself. A ceiling that loses the same share begins to sag, so plaster ceiling repair usually starts earlier in the life of the failure than comparable wall work.
Reading a Ceiling Before We Touch It
Look across the ceiling from one side of the room rather than standing directly underneath it. A dip in the flat plane means the field above you is hanging from fewer keys than it was built with, leaving the remaining keys to carry the load the failed ones used to hold.
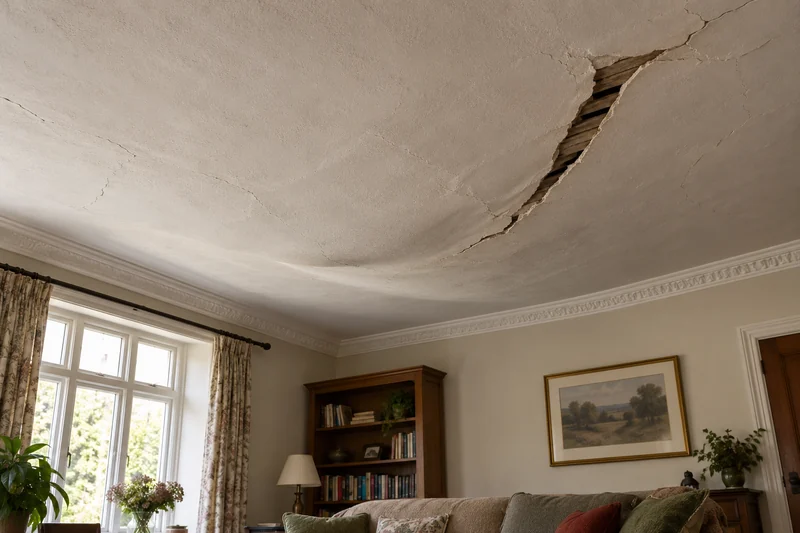
We tap across the ceiling from below and map every hollow area before putting any weight back into it. If there is a stain overhead, we take a moisture reading first, because in this housing stock the air handler and its condensate line sit in the attic directly above the ceiling, and a live water source has to be ruled out. A wet ceiling goes to our water damage service instead. We do not skim over any field that has started to drop.
Re-Anchoring Overhead
Plaster washers are the fastening method here just as they are on a wall, and on a heavy field we drive them into the ceiling joists above as well as into the wood lath. A sagging field is brought back up gradually over several passes instead of being pulled tight all at once, because plaster that has already lost keys will crack apart if it is drawn up too quickly. The same area of ceiling needs more washers than it would on a wall, and the coats built back over them are thinner and more numerous. All of that makes overhead work slower than the same repair at eye level.
When a Plaster Ceiling Has Gone Too Far
Two findings from the tap test and the moisture reading tell us when a field has no reserve left. The first is how much of the ceiling sounds hollow: when those hollow areas run together across most of the field instead of remaining separate patches, almost no keys are still gripping, and the few that remain are already carrying more load than they were built for.
The second is the condition of the plaster itself. Sound plaster is hard enough to resist a fingernail, while plaster that has stayed wet for a long time becomes soft and crumbles under light pressure. A washer works by pressing firm plaster back against the lath. Tighten one into soft material and the head pulls straight through, taking a fist-sized piece of ceiling with it.
Where the plaster overhead is widely soft, we remove it rather than trying to anchor it, and the job becomes a new ceiling, which we quote as a separate service. Our written assessment explains which approach your ceiling needs, records how far the failure has spread, and prices each option separately so you can decide before anything is disturbed.
Keeping Original Plaster in an Older Montgomery County Home
Original plaster is the wall material itself, mixed wet and applied by hand rather than delivered as a board and screwed in place. You find it far more often in the older communities around The Woodlands than inside the villages, which were built from the 1970s onward. A wall like that is not machine-flat, and the slight movement across its surface is part of the way the room looks. Plaster restoration keeps that original wall in place and repairs the parts that have failed, instead of stripping the room back and rebuilding it in board. You do not have to choose between a sound wall and the one you already like.
What Original Plaster Gives a Room
The finish on an old wall is harder than the paper-faced board that replaced it, so it handles impact differently: a chair back that would dent board often leaves plaster unmarked. The wall is also thicker than the board that replaced it, and that extra mass absorbs more sound passing between rooms. Many of these walls have a lime finish, the thin white top layer troweled on wet, and because a hand-applied finish is never perfectly even, low-angle light reveals subtle depth instead of a blank plane. Once the plaster is removed, none of that returns with new board.
Matching an Old Finish Without Flattening It
We work the new finish plaster to the same scale as the surrounding wall, stopping where that surface stops instead of polishing the patch smoother than its neighbors. A patch finished too flat stands out as soon as side light crosses the wall, which is exactly what you want to avoid on a wall you chose to keep. Deeper texture matching across an entire room is handled through our finishing and texture service. Before the final coat goes on, we put the agreed finish level in writing so you know exactly what surface character you are getting.
Free Quote FormPlaster Work in a Humid Subtropical Climate
The Woodlands has a humid subtropical climate, with summer highs near 94°F arriving in air that already holds a great deal of moisture, while winter lows near 40°F do little to dry a house out. That changes plaster repair in one specific way. A wet coat on your wall releases its water into the room around it, and when the air is already holding most of the moisture it can, that process slows down. Setting-type compound is the exception because it hardens without depending on the room to dry it, so the weather outside has far less effect on its set time.
What Humidity Does to the Schedule
Humidity and plaster set the calendar for the work. A coat that dries by evaporation stays damp longer here than the same coat would in a dry climate, and applying the next coat before the one beneath has released its water traps that moisture inside the wall, where it later shows up as cracking along the repair. We use setting-type compound when a room has to return to use on a firm date because its hardening time can be counted on rather than waited out. Your written quote states how many days the work will take, so the schedule is agreed at the start instead of discovered partway through.
Checking the Wall Is Dry Before It Is Closed
A moisture meter is a handheld instrument that tells us how much water is trapped inside a wall we cannot see into. We place it against the exposed plaster and the lath behind it before the first coat goes on, not after the wall has been covered.
Closing a damp wall puts the same failure back in the same place, because trapped water has nowhere to go and works loose whatever we have just rebuilt. If the wall still reads wet, we leave it open with the damaged plaster removed and return to test it again rather than finishing it on the day we had planned.
That is the one part of your schedule we cannot promise in advance, which is why we take the reading early enough to tell you about a delay before it costs you anything. If a leak or flood is still feeding water into the wall, water damage drywall repair is a separate service and we quote it separately.

Plaster Repair Across The Woodlands, Montgomery and Harris Counties
Lath and plaster is found behind the paint in older homes across Montgomery County, especially in the older communities that ring The Woodlands more than inside the villages. If yours is one of them, those walls were built long before drywall became standard. The local weather also affects when the work can be done. Summers are hot and humid enough that a fresh coat holds its water longer than it would in a drier inland climate, which is why we schedule plaster repair The Woodlands homeowners request around drying time as much as around labor.
The Woodlands Drywall Co. repairs plaster walls and ceilings throughout the villages of The Woodlands and the surrounding communities, covering 21 areas in all. You can have us come out to any of them:
Where The Woodlands Drywall Co. Provides Plaster Repair
Villages of The Woodlands:
- Alden Bridge
- Cochran’s Crossing
- College Park
- Creekside Park
- Grogan’s Mill
- Indian Springs
- Panther Creek
- Sterling Ridge
And the surrounding communities:
- Conroe
- Atascocita
- Spring
- Porter
- New Caney
- Humble
- Kingwood
- Tomball
- Willis
- Pinehurst
- Shenandoah
- Oak Ridge North
- Magnolia
Plaster Repair Questions
How do you repair damaged plaster?
Plaster repair starts by finding out how much of the wall is still securely attached to the lath behind it. We sound the area by hand, then anchor any firm plaster with plaster washers. Once the wall is stable, we apply a bonding agent so the fresh material grips properly, then rebuild the repair in layers until it sits flush with the surrounding wall. What decides your repair is whether the plaster itself is still firm: firm plaster is anchored and kept, while plaster that has gone soft or crumbles under a fingertip is removed because nothing will hold to it.
Can I patch plaster myself?
Small, shallow holes in plaster that is still solid are a reasonable DIY repair with ready-mixed joint compound and a putty knife. Loose plaster is a different problem because it has separated from the wood behind it, and filling the surface does nothing to close that gap. The patch moves with the wall and cracks again. Sounding the wall first tells you which problem you have, and that test is worth doing before you buy anything.
Can you just plaster over old plaster?
Yes, as long as the material underneath is sound enough to carry the added weight. Old plaster stays firmly in place where it still grips the lath, and a new coat over a wall in that condition holds up well. Where that grip has failed, adding more material only increases the load on a field that is already coming loose, causing the area to fail sooner than the plaster alone would have. What happens before the new coat goes on determines the result. Loose or flaking paint comes off before anything else, down to material that holds, because a bonding agent adheres to whatever it touches, and otherwise it would be bonding to the paint.
What is the best thing to patch plaster with?
The depth of the damage determines the material, not the label on the tub. Anything with real depth, such as a hole that reaches the lath or a missing area several layers thick, is rebuilt with setting-type compound or basecoat plaster, which harden through a chemical reaction and hold their thickness. Ready-mixed joint compound dries by losing water, so a deep fill shrinks back and sinks below the surrounding wall. Ready-mixed material is better suited to a thin skim over sound plaster, where it smooths texture and hairline damage across the face of the wall.
Can you use spackle to patch plaster walls?
Spackle works well for nail holes, picture-hook holes and small dents. Beyond that size, it shrinks as it dries and pulls away from the edges of the repair, leaving a visible ring or a hairline gap around the filled area. A crack that continues opening and closing with the seasons will come back through spackle at any width, because the filler has no strength of its own and simply moves with the wall on either side.
How do I know if my plaster is still attached to the lath?
Put your palm flat against the wall and press with steady pressure, then tap the same spot with your knuckles. Plaster that is still firmly gripping the lath sounds dull and does not move under your hand. A failing area sounds hollow and may flex slightly inward when you press, showing that the plaster keys have broken away behind it. Test well beyond the visible damage, extending a foot or two past the edges in every direction, because the failure spreads outward from where it began and nearby plaster can already sound hollow even while the paint still looks perfect.
Is it better to repair plaster or replace it with drywall?
Repairing keeps the wall you already have, along with its original surface and thickness. Replacement means stripping the plaster and lath from the framing and hanging gypsum board in their place, which is a larger job that changes the room. The new board finishes lower than the plaster it replaced, so every door casing, window casing and baseboard in the room meets a wall plane that has moved, and the trim has to be removed and refitted to the new line.
Get Your Plaster Assessed by The Woodlands Drywall Co.
Before you decide between plaster repair and a new wall, have someone inspect what you already have. The Woodlands Drywall Co. visits homes across The Woodlands and the towns around it, examines the wall in person at no charge, and sends you an itemized written quote afterward. Call us at (346) 248-4075 or tell us about your wall through the quote form, and we will arrange a time to come and see it.