
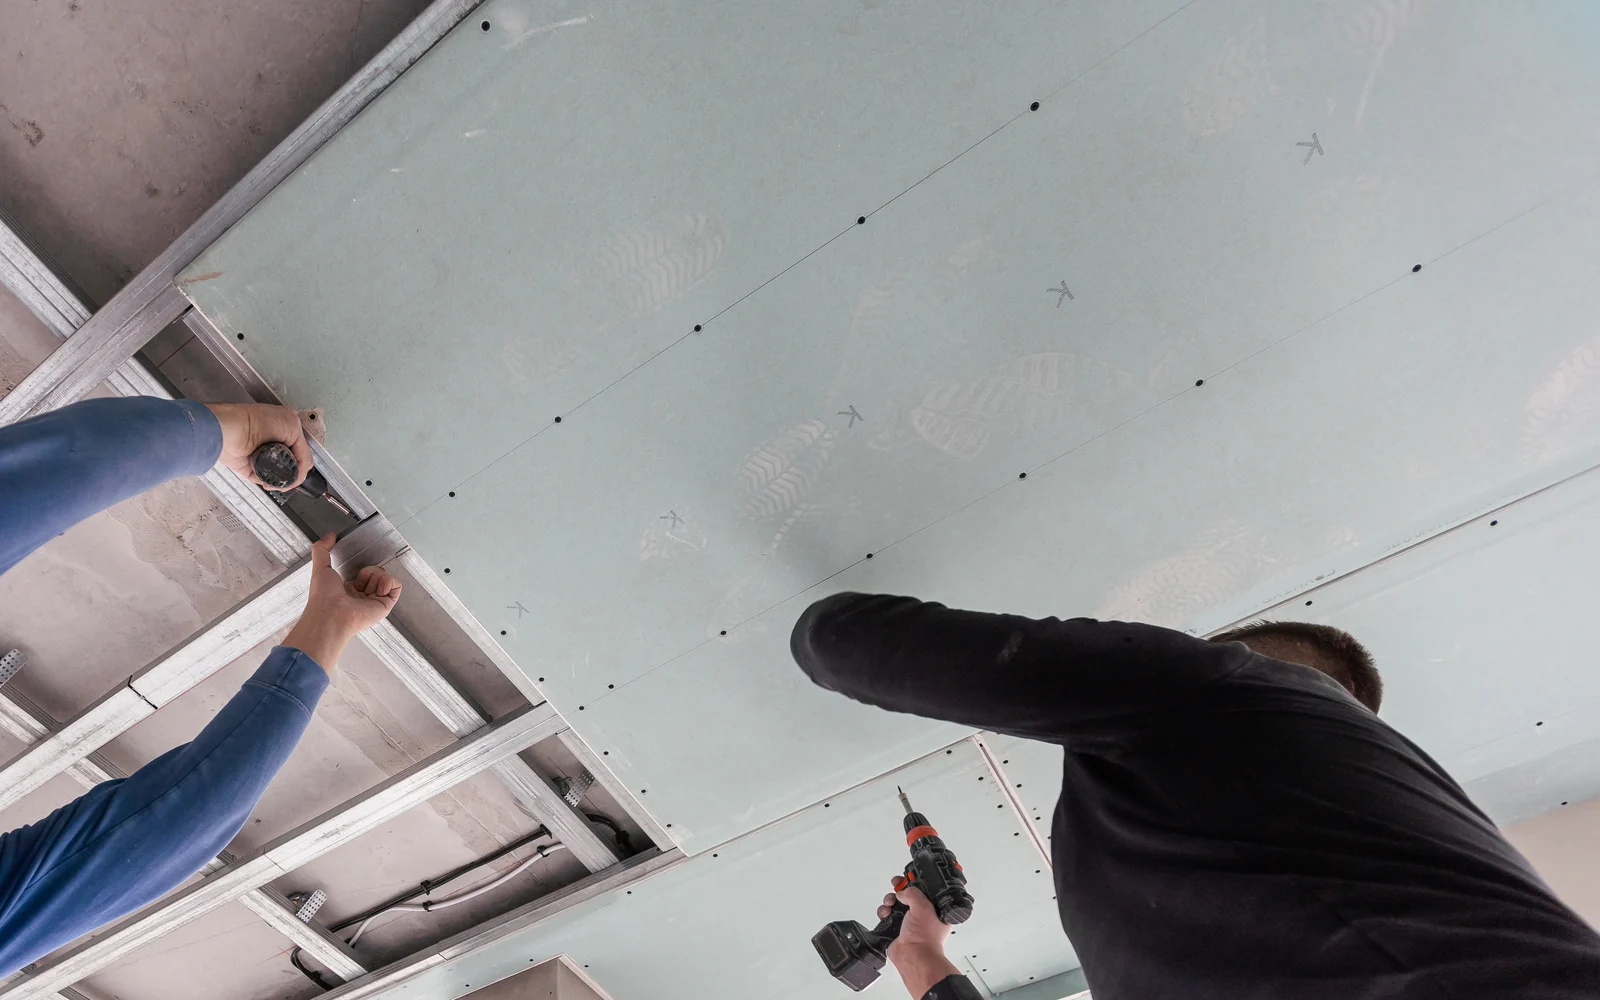
Ceiling Drywall Installation in The Woodlands, Texas: New and Replacement Ceiling Board from The Woodlands Drywall Co.
The Woodlands Drywall Co. has spent 20 years on ceiling drywall installation in residential and commercial interiors around The Woodlands, Texas. Most people call us because a ceiling has been patched one time too many or because a new room needs a ceiling that was never there. We install new ceiling board in additions, garage conversions and enclosed patios, replace a drywall ceiling after the old board has come down, choose the board to match the framing and the room, hang and fasten it overhead, and finish it to a stated level.
Joists are the framing members that support a ceiling. We run the board across those joists rather than along them, and we use 5/8 inch board where the joist spacing calls for it. A panel lift holds a full gypsum panel tight to the framing while it is fastened, so no one has to hold the sheet by hand while screws are driven. Hanging drywall on ceiling framing here follows ASTM C840 and GA-216, published application standards rather than credentials we hold. Your estimate also states the finish level clearly instead of leaving it vague.
We work throughout Montgomery and Harris counties, including Shenandoah and Magnolia. Call (346) 248-4075 or use the quote form for a free on-site estimate.
Get A Free Quote
When a Ceiling Needs New Board
A ceiling either stays in place or comes down, and that one decision determines everything that follows. If the existing board is still sound and firmly fastened, the damaged section is cut out and blended back in, which is ceiling repair and a separate service from this one. If the board is coming down anyway, or if there was never a ceiling there to begin with, you are looking at a new ceiling built from the framing down. We determine which situation you have by inspecting it on site, and the four situations below are the ones that usually lead to that work.
The Ceiling That Has Been Patched One Time Too Many
You can see the tell from the doorway once the light is low: patch outlines and slightly raised edges show through the paint, so the ceiling no longer looks like one flat plane. Raking light is a lamp aimed low across a surface, which throws every ridge into relief, and a ceiling that looks acceptable at noon can look quilted under it. Old texture and fresh joint compound also age at different rates, so each new blend drifts a little further from the surface around it.
Once several repairs have built up in one room, replacing ceiling drywall across the full span often costs less than going through another round of blending on a patched ceiling. A sagging or bowed panel is a different issue because the board is losing its hold overhead, not simply leaving a surface that looks wrong.
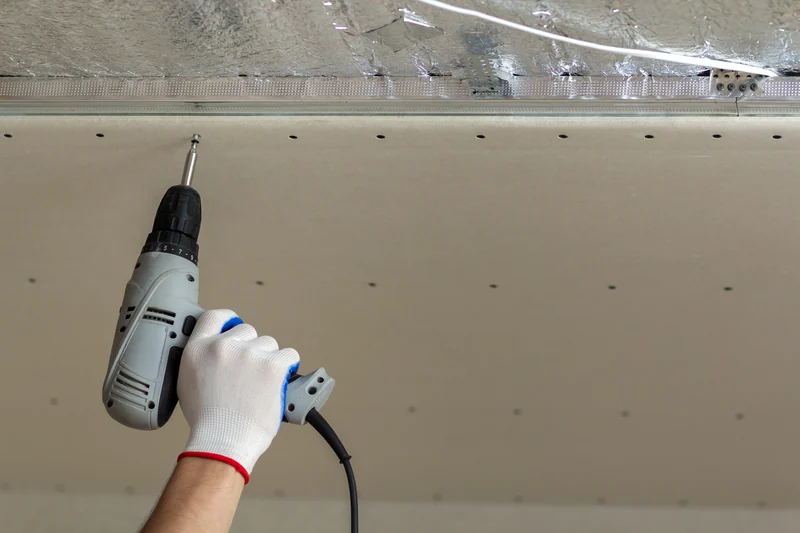
Ceilings in Additions, Garage Conversions and Enclosed Patios
Three kinds of project bring a ceiling into a space that never had a finished one. An addition gets its ceiling as part of the interior build, alongside the walls. A garage conversion turns parking space into living space, and the code expects more from the ceiling above a converted garage than it did before, which changes the panel we specify. An enclosed patio is a covered outdoor space that has been closed in and conditioned, so its ceiling has outdoor humidity on one side.
In all three, the attic access panel, light positions and any vents are laid out before the first sheet of ceiling sheetrock goes up. Moving any of them afterward means cutting back into the new ceiling installation work.
After a Leak, Once the Old Board Has Come Down
In this market, most ceiling replacement starts with a problem above the ceiling. The attic air handler is the usual culprit: the drain line that carries away its condensation plugs, and the secondary drain pan underneath, the tray meant to catch the overflow, has rusted through. A roof leak during storm season is the other common source of a water damaged ceiling.
The order is not negotiable. The trade responsible for the leak fixes it first, and the wet surface is cut out and dried as a separate service. We check the framing with a pin-type moisture meter, and it has to be dry before moisture-resistant board goes back up.
Attic Step-Throughs and Damage From Above
Storage boards, air conditioning service and insulation work all put weight on attic framing, and a foot that lands between two joists goes straight through. A bay is the space between one framing member and the next, and a step-through breaks the gypsum core across that entire bay. The face paper tears well beyond the visible hole, so the sound board starts farther out than the damage makes it appear.
That is why replacing sheetrock ceiling here means taking the panel back to the joist line: the new board needs framing along every edge so it has something solid to fasten to. During the same visit, we check whether any wiring or ducting above took part of the weight. Walk boards laid across the joists give you a safe place to stand and help prevent the next step-through.
Free Quote FormChoosing the Board for a Ceiling Drywall Installation
A ceiling drywall installation starts with a decision made before a single sheet leaves the truck: which panel goes overhead. Ceiling board is not the same product as the board on the wall beside it, because a wall only has to stand upright while a ceiling has to hang against gravity for the next several decades. Three things determine which panel is right for your room: the spacing of the framing overhead, how the room is used, and the weight that will sit on top of the board once the attic is finished.
You can check exactly what we chose because the written estimate names the panel instead of leaving that decision to whoever is on the lift that morning. We specify gypsum board from USG, National Gypsum or CertainTeed, so the product comes with a published specification rather than arriving as an unmarked pallet. If the room calls for a specialty panel, that panel costs more than a standard sheet and appears on its own line with the price clearly shown.
Thickness, Joist Spacing and Sag Resistance
The measurement that decides it is called spacing on center, taken from the middle of one framing member to the middle of the next. Newer builds in The Woodlands commonly use 24 inches on center. That spacing leaves a wider unsupported span of board between supports, so the ceiling drywall thickness has to account for it.
A water-based texture is the sprayed finish most ceilings here receive, such as knockdown or orange peel, and it puts water into the face of the board. GA-216 sets the rule for that combination. At 24 inches on center under a water-based texture, the panel is 5/8-inch board hung perpendicular to the framing. The alternative at that spacing is 1/2-inch gypsum ceiling board, a sag-resistant half-inch panel made for overhead use, also hung perpendicular. At 16 inches on center, the supports are close enough together that the rule relaxes to 1/2 inch, still hung perpendicular. So plain 1/2-inch wallboard on wide framing under a sprayed texture is not the economical choice; it is the wrong one.
The same published specification identifies the conditions that let a ceiling sag: poor drying, a vapor retarder trapping moisture above, framing that changes direction, and the wrong primer. GA-216 requires a compatible drywall primer, usually PVA, before any water-based texture. An unprimed ceiling absorbs the water straight out of the texture, which softens the face beneath it. Our humidity slows drying more than it would in a dry climate, so that first condition matters here. We include priming on every installation, while finish painting appears as a separate optional line that you can take or leave.
The Garage Ceiling Under a Bedroom
Where a bedroom or another habitable room sits directly above an attached garage, the ceiling between them is specified by code rather than by preference. Type X board has a reinforced core that holds together longer under fire than an ordinary panel, and 5/8-inch Type X is what the residential code requires in that position. The requirement comes from the International Residential Code, and your local building department confirms which edition is in force on your property.
The rating belongs to the complete tested assembly rather than to the panel alone. That assembly includes the board, the framing behind it, the fasteners, the treated joints and anything passing through it. Rated walls and the full assembly detail are a separate service.
Damp Rooms, Garages and Moisture-Resistant Ceiling Board
Steam rises, so a bathroom ceiling takes more moisture over its life than the walls below it, and a laundry room does the same. A moisture resistant drywall panel is made for that exposure. Green board is the older version, named for the treated green face visible on the panel. Newer panels add a mold-resistant core, and some replace the paper face with fiberglass. Less paper on the surface leaves less for surface growth to feed on.
A garage ceiling sits in unconditioned air and faces the same damp conditions, but when that ceiling separates the garage from a habitable room, the code-required panel comes first and the damp-air preference does not override it. Gulf humidity is why we specify the ceiling board room by room instead of ordering one panel for the entire house. Specialty moisture and mold-resistant systems are a separate service. Board for your job is not stored in a hot garage beforehand; it goes up dry.
What the Attic Insulation Above Will Weigh
Blown or loose-fill attic insulation is the loose material spread across the attic floor above your ceiling, and it rests on the ceiling board rather than on the framing. GA-216 limits how much of that weight a panel may carry unsupported, and the limit changes with the panel. With framing at 24 inches on center, 5/8-inch board is allowed 2.2 pounds per square foot, and 1/2-inch gypsum ceiling board is allowed the same 2.2 pounds per square foot as the thicker panel. Ordinary half-inch wallboard at that spacing is limited to less, which is another reason we do not use it there.
A deep re-insulation laid over the wrong board causes ceiling sag even when the ceiling was hung correctly, so the drywall weight limit needs to be settled before anything is ordered. Ask your insulation contractor what depth they are aiming for. The timing runs against what most people expect: GA-216 puts loose-fill in after the board is hung but before taping, so the panels are already loaded and settled before any wet finishing begins. Anything added years after we leave still has to stay within that same limit.
Hanging a Ceiling So It Stays Flat
Hanging drywall on ceiling framing is the stage that determines everything you will notice later, even though none of it remains visible once the paint is on. Four decisions carry the work: what the panel lands on, how it is held while it goes up, how it is fastened, and where the seams fall. Compound and paint can hide a small imperfection, but they cannot pull a ceiling back into one flat plane once the board has been screwed to framing that was never straight. If you are standing in the room five years from now looking at a line of shadow across the ceiling, the cause was set during these few hours.
Reading the Joists Before the First Sheet Goes Up
Before a single panel is lifted, we measure the joist layout rather than assume it because the spacing determines which board can be used above it. We then pull a string line across the span, a taut line stretched from one side of the room to the other that shows high and low spots against a straight reference. Where a joist sits low, we bring the plane true with shims or furring strips, thin strips fixed across the ceiling framing to straighten the surface the board will land on.
Where the framing changes direction, usually at a bulkhead or a dropped area, the ceiling is more likely to sag later, so we give that line particular attention. We also locate wiring, ducting and can-light housings before the board arrives. Framing that has visibly moved is a structural question, and we hand that over rather than cover it with board.
Panel Lifts and Holding a Sheet Overhead
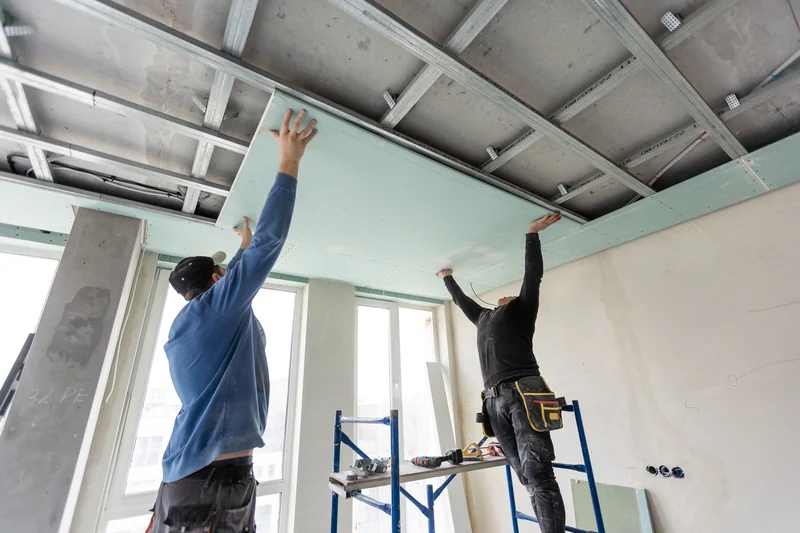
A panel lift is a crank-operated stand that raises a full sheet flat against the framing and holds it there while it is fastened. That matters more on a ceiling than anywhere else in ceiling sheetrock installation because a 5/8-inch sheet is noticeably heavier than the half-inch board used on a wall and is awkward for two people to hold steady overhead.
The drywall lift presses the panel firmly against the framing, so no gap is pulled shut with screws; a panel fastened with a gap behind it works loose over the following year and pushes its screw heads out through the paint. Hand-lifting also crushes panel edges, and a crushed edge shows as a ridge once the seam is taped. In tight rooms and on stairs where no lift fits, we plan the sequence and the crew before the workday begins.
The Screw Pattern and the Face Paper
The face paper is the paper skin bonded to each side of a gypsum panel, and it gives the panel its strength. A screw driven through that paper has nothing left to grip, so each head is set just below the surface without breaking it. That shallow recess is a dimple, and joint compound fills it flush.
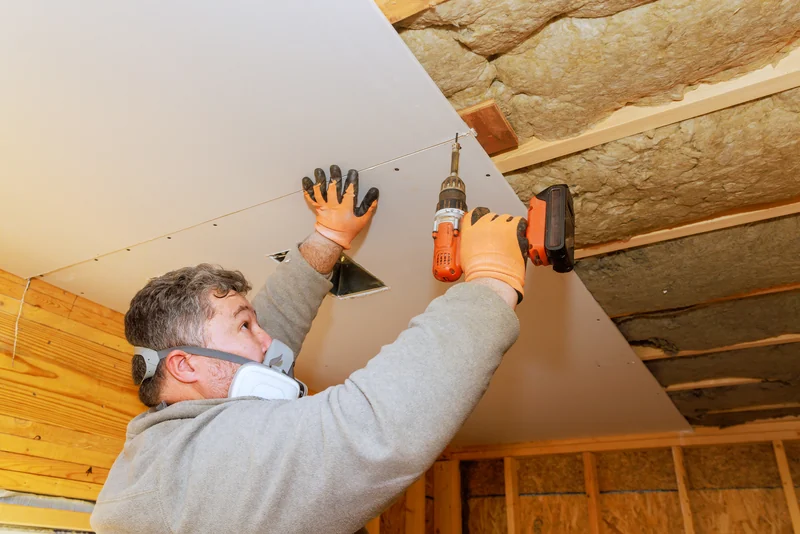
Typical ceiling spacing under GA-216 is about 12 inches along each framing member, and typical is the right word because the spacing changes with the assembly, panel direction, framing and fastener. It is not a rule that applies everywhere. A rated assembly follows its own listed fastening instead. Whatever the spacing, we keep fasteners at least 3/8 inch in from a panel edge because a screw placed closer than that crumbles the edge it is meant to hold.
Where the Ceiling Seams Fall
Panels run perpendicular to the framing, which breaks the long joints across the room instead of letting them continue in one line. A tapered edge is the shallow factory bevel along a panel's long side, and when two tapered edges meet, the seam sits slightly recessed so the compound can finish flat rather than stand proud against gravity. A butt joint is where two cut ends meet with no taper to absorb the build-up, so it has to be feathered out wider and is the seam most likely to show.
We stagger butt joints rather than lining them up, and on long runs we lay out the sheets to keep seams off the window wall where light rakes across them. On a large ceiling, ASTM C840 calls for a control joint at set intervals, a deliberate trimmed gap that allows the surface to move; an open-plan living and dining ceiling is the usual case for one here. The texture applied over a finished seam is a separate service.
Why the Ceiling Goes Up Before the Walls
Ceiling panels go up first, and the wall panels tuck under the ceiling edge so the corner joint closes at the top of the room instead of being built out with compound. Reverse that order and the same joint has to be filled, creating a wider, weaker repair from the first day. The top wall panel is cut to fit rather than forced into place, so nothing bows the ceiling edge above it. That wall panel also supports the outer edge of the ceiling board and makes a floated corner possible. On a ceiling-only replacement, your existing walls are already in place, so the edge detail depends on what we find.
Floating the Wall-Ceiling Corner
Truss uplift is the seasonal rise of a roof truss as attic moisture changes through the year. The truss arches slightly, lifts the ceiling board with it, and opens a line along the wall-to-ceiling corner. A ceiling crack caused by truss uplift reopens after every repair because taping it again does nothing to stop the movement underneath.
GA-216 permits the floating angle method for exactly this condition. Floating corners means holding the first fasteners back from the corner so the panel can flex there instead of tearing. The wall board underneath supports the floated ceiling edge; where there is no backing behind it, clips designed for the corner do the same job, using small brackets to carry the panel edge in place of a stud. The method has one limit we do not cross: a ceiling is never floated where a fire rating or shear value applies, which means a garage ceiling is fastened tight. A hairline crack there in the first year is the house settling into its seasons.
Cutting In Lights and HVAC Registers
Every opening in a new ceiling is a place where the work can go wrong, so we mark each one from measurements taken before the panel is lifted instead of guessing from below. A can light housing is the metal canister a recessed light sits inside, and a hole cut too large around it leaves a gap the trim ring has to cover. Supply registers, return grilles and smoke alarms each need an opening cut to their own size. A supply register is the vent that blows conditioned air into the room.
Each opening is cut before the panel is fully fastened rather than afterward, and attic access openings are framed instead of simply cut out. Your electrician and HVAC contractor set their boxes before board day, so the measurements we use match the final locations.
Why Choose The Woodlands Drywall Co. for Ceiling Drywall Installation
Ceiling drywall installation is regular weekly work for our crews, not something we fit in between wall jobs. We have spent 20 years hanging board overhead in occupied houses and in commercial interiors around The Woodlands, and we are fully insured for both residential and commercial projects.
Before any work starts, you get a document you can read and compare. The on-site inspection is free, and the itemized written estimate arrives within 24 hours of that visit. It sets out the specification line by line:
- the board type and thickness
- the finish level specified for the joints
- any optional work, with its own separate price
The person who measures your ceiling and prices the work is the same person who runs the crew that hangs it, so nothing gets handed off to someone who has never seen the room. On occupied jobs we use vacuum-assisted sanding, a sander fitted with extraction that pulls dust in at the tool instead of letting it reach your furniture. Cleanup is included in the scope and is not a separate charge. Call us at (346) 248-4075 or send us the room details through the quote form to book the inspection.
What a New Ceiling Costs
A new ceiling is priced by the square foot of ceiling, and two choices affect that price more than anything else: the finish you want on the surface and how difficult the room is to work in. Hung, taped and finished to Level 4, ceiling sheetrock installation typically runs $1.50 to $3.50 per square foot. Level 5 generally runs $3.00 to $4.50 per square foot because the entire surface receives an extra coat of compound. Those rates cover the ceiling alone, measured across the ceiling itself rather than the floor area or the surrounding walls.
Repairs are quoted as a job instead, since a patch has no meaningful square footage. Photos let us give you an initial range, and the on-site look sets the firm price. Your estimate separates labor, materials, finish level and optional work, so you can see where the ceiling drywall installation cost sits before you commit to any of it. Financing is available for qualifying work.
Ceiling Area, Height and Access
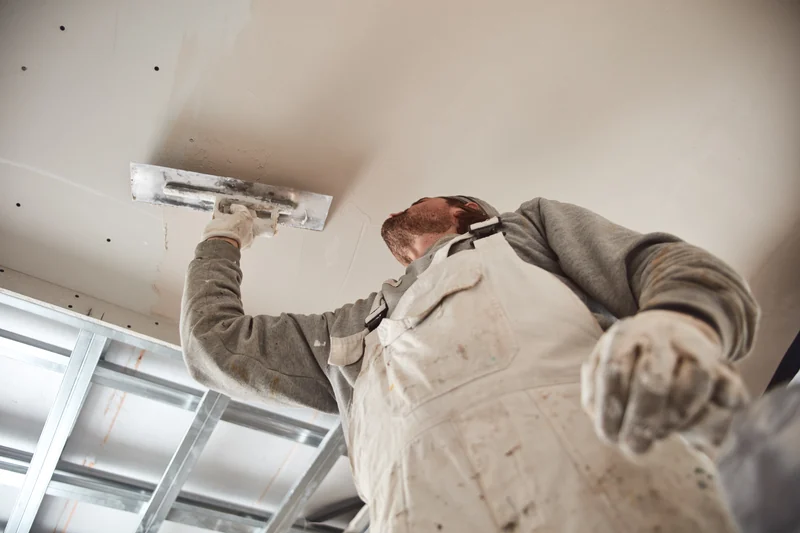
We measure the ceiling area on site, and that square footage is what the price per square foot is applied to. Height changes the labor rather than the material. An eight-foot ceiling is worked from a bench; a two-story entry is not, and a finisher there works on stilts, strapped leg extensions that raise them a foot or two off the floor.
A lift will not fit in every room, and hand-hanging a sheet takes longer than setting it with one. Vaulted, tray and sloped ceilings add angled cuts and extra edge work. How easy the room is to get into shapes the total too: one large room costs less per square foot than several small ones, because the crew sets up once.
Board Specification and Finish Level
The board specification you need is determined by what sits above the ceiling, and that choice shows up in the price. Thicker 5/8-inch and sag-resistant panels cost more than standard half-inch board, while moisture-resistant and Type X panels each carry their own material and labor costs. The finish level has the larger effect on price. Level 4 is the common finish; the extra skim coat for Level 5 is priced as additional labor and compound, and the difference between the two is the biggest single finish choice you will make. Each specialty item appears on its own line instead of being folded into the rate.
What Has to Come Down, and What Goes Back
Ceiling removal is a separate part of the job that comes before any new board goes up. Demolition, dust containment and disposal of the old panels are priced as labor and haul-away, while taking light fixtures down and refitting them afterward appears on a separate line. We replace any insulation disturbed during removal with new material rather than putting it back. A room full of furniture costs more to work in than an empty one. On an older ceiling, testing the existing material affects both the schedule and the price.
For a price you can budget against, call (346) 248-4075 or tell us about the ceiling in the quote form. We measure it on site, then put the figures in writing.
Ceiling Installation Day, Room by Room
A ceiling installation runs through five steps, whether we are replacing the board in one bedroom or across an entire floor. The number of rooms changes how long each step takes, not the steps themselves. A single-room ceiling of about twelve feet by twelve feet takes three to five days from the first drop cloth to the final walkthrough, and most of the difference between three days and five comes from drying time between finish coats rather than working hours. You will have that window in writing before the job starts because the schedule is set when we price the work, not discovered after the crew is already in your house.
-
The site visit and the written estimate
Someone comes to your house, measures the ceiling and looks at the framing above it, and the visit costs you nothing. The measurements come directly from the ceiling itself, which is what turns a range into a firm price.
-
Clearing and sealing the room
You move out what can be moved, and we cover what stays. Floors go under drop cloths, and the doorway is sealed with plastic sheeting. That sheet is the containment barrier, a wall of plastic that keeps the work area separate from the rest of your house, and it is how dust control works in practice. Light fixtures, ceiling fans and air registers come down and are labeled so they go back where they were.
-
Delivery and hanging day
The board arrives the morning it goes up, so no stack sits in your hallway for a week. Where there is an old ceiling, it comes down first. Panels are then raised on a lift, positioned and fastened, and the openings for lights and vents are cut as each panel goes up. This is the loud day.
-
Taping, finishing and texture
The joints between panels are taped and coated with joint compound, and each coat has to dry before the next one goes on. The finish level you were quoted is the finish level you get. Before any sprayed texture goes on, the ceiling is primed with PVA primer and checked again under raking light.
-
Cleanup and the final walkthrough
Sanding dust is pulled into a vacuum at the sanding head instead of being swept up afterward, and the debris leaves with us. Then we walk the ceiling with you from where you normally stand in the room. Anything you point out goes on a punch list and is put right before we invoice you.
To get a date on the calendar, call The Woodlands Drywall Co. at (346) 248-4075 or describe the room in our quote form. The site visit comes first, and your installation dates follow in writing.
Who Hangs a Ceiling, and Where This Work Stops
A drywall contractor is the trade that hangs panels overhead, fastens them to the framing and finishes the joints, and on most jobs the same contractor installs drywall on the walls beside them. What separates a ceiling installation you can check from one you simply have to trust is that the work follows written rules anyone can read.

The Ceiling Tables Behind the Work
Three published specifications sit behind a ceiling, and a published specification is a written industry rule anyone can look up rather than something a company holds. GA-216 is the Gypsum Association specification that carries the framing, fastening and insulation tables quoted throughout this page. ASTM C840 is the application standard for how panels are fitted and joints are treated. GA-214 sets the finish levels, a scale running from Level 0 through Level 5 that describes how far the joints are smoothed before paint. We build to all three. That gives you a quote that names the panel, the thickness and the finish level, so you can compare it line by line with another quote.
Asbestos, Mold and Framing: Where We Hand the Job Over
Three situations stop our work and send you to someone else. A ceiling installed before 1990 goes for asbestos testing before anything is disturbed, and if the test comes back positive, a licensed abatement contractor handles that material before we return. Opening a water-damaged ceiling sometimes exposes established mold growth; if we uncover it, we stop, document it and refer you to a licensed mold professional before the rebuild continues. Ceiling framing that has visibly moved, dropped or opened up is not ours to judge, and it can warrant evaluation by another qualified professional before new board goes up. We make each referral plainly, and the work waits until the right trade has cleared it.

Ceiling Drywall Installation Across The Woodlands, Montgomery and Harris Counties
Summers here are hot and humid, with highs near 94 degrees, and that humid subtropical climate keeps attic air damp for months at a time. Gulf storm season puts most ceilings on the replacement list because wind-driven rain finds its way in above you and the board below gives up first. Houses in this area range from the first villages of the 1970s to homes finished last year, and a ceiling drywall installation in one is not the same job as in the other. Older framing and current truss framing take different board, so we measure before we order.
The Woodlands Drywall Co. serves the villages of The Woodlands and the surrounding communities in Montgomery and Harris counties as one service area rather than separate pricing zones.
The Communities The Woodlands Drywall Co. Serves
Villages of The Woodlands:
- Alden Bridge
- Cochran’s Crossing
- College Park
- Creekside Park
- Grogan’s Mill
- Indian Springs
- Panther Creek
- Sterling Ridge
And the surrounding communities:
- Conroe
- Atascocita
- Spring
- Porter
- New Caney
- Humble
- Kingwood
- Tomball
- Willis
- Pinehurst
- Shenandoah
- Oak Ridge North
- Magnolia
Ceiling Installation Questions
Can a handyman put up drywall?
A handyman can patch a small hole in a ceiling and finish it so the repair disappears. A whole ceiling is a different job: the sheet is too heavy to hold flat overhead by hand, and the right board depends on the joist spacing above it. When handyman drywall work fails later, the problem is almost never the mudding. It is the board choice or the fastening, and both are hidden under paint by the time anyone sees the result.
What type of contractor installs drywall?
You want a drywall contractor, the trade that hangs, tapes and finishes board to ASTM C840. On a ceiling, the same crew usually takes the old one down and hauls it away, so you do not have to arrange disposal separately. None of that work starts until the trades above the ceiling have signed off, because their wiring and ductwork become unreachable once board covers the joists. A general contractor running a larger remodel subcontracts the ceiling to this same trade, which is who installs drywall either way.
How much does it cost to install a new drywall ceiling?
Expect a price for every square foot of ceiling. A ceiling finished to Level 4 runs from $1.50 to $3.50 per square foot, while Level 5 runs from $3.00 to $4.50. A single small ceiling carries the setup cost of a full visit across less area than a larger room, so a one-room job lands toward the upper end of its range more often.
What thickness of drywall goes on a ceiling?
Ceiling drywall thickness follows the framing spacing above it. Where the joists are 24 inches apart and a texture will be sprayed on, the board is 5/8-inch or a sag-resistant half-inch; plain half-inch board is allowed at 16 inches on center. The detail most people miss is that the texture is part of the specification, so a smooth ceiling and a sprayed one are not the same job even in the same room.
How long does it take to install a ceiling?
Ceiling installation time runs three to five days for a single room. Hanging usually takes one day, while drying time between finish coats determines the rest of the schedule. Adding a second room to the same visit adds very little extra time because both ceilings dry at the same time.
Do you hang the ceiling or the walls first?
The ceiling goes first. Hanging ceilings first means the wall board is fitted afterward and tucked under the ceiling board so its top edge supports the ceiling edge. On a ceiling-only replacement in a finished room, the walls are already in place and that hanging order cannot be followed, so we detail the ceiling edge against the existing wall instead.
Can a new ceiling go over the old one?
Sometimes, if the existing ceiling is sound, flat and firmly fastened. A ceiling over ceiling job doubles the weight the framing carries and seals in the condition of the old board, including water staining or loose fastening you would otherwise have found. Every light, register, trim piece and door head also has to be brought down to the new ceiling height, which is where the saving usually disappears.
Price Your New Ceiling with The Woodlands Drywall Co.
Pricing a ceiling starts with someone standing under it. We come out to The Woodlands and measure at no charge, and that free estimate covers the room, the height and the access we need. You get the itemized ceiling quote in writing a day after we have seen the room, board and finish and options each on their own line. Call The Woodlands Drywall Co. at (346) 248-4075 or use our quote form to request your free on-site estimate.