
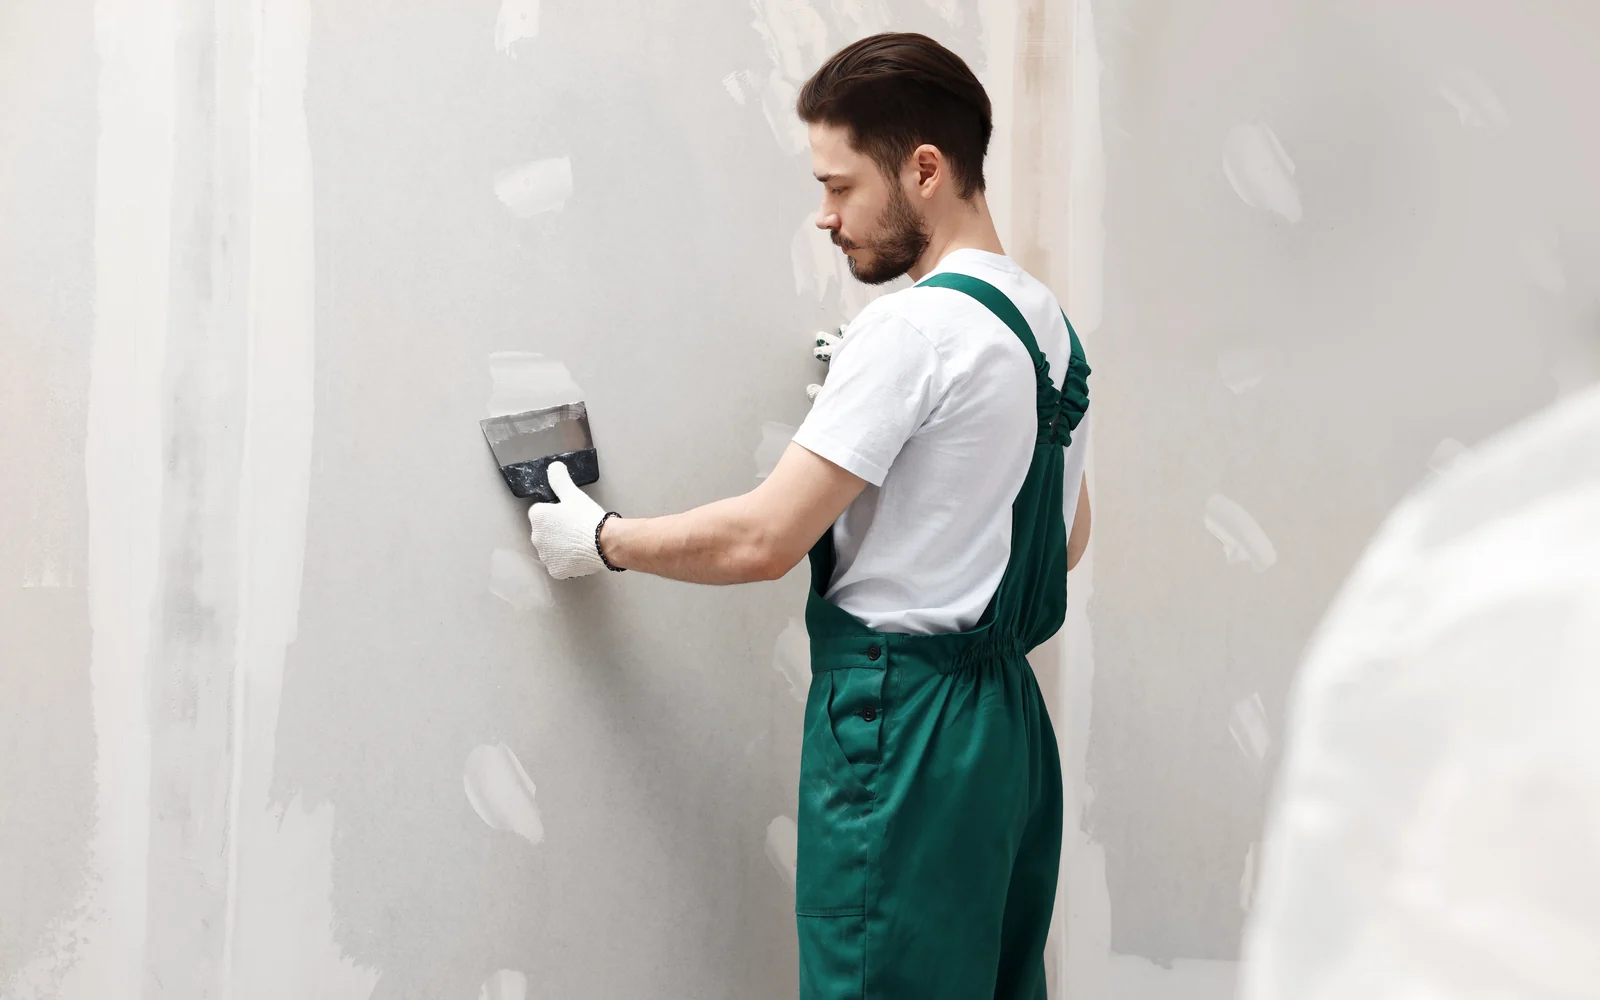
Drywall Repair in The Woodlands, TX: Holes, Cracks, Nail Pops and Corner Bead from The Woodlands Drywall Co.
The Woodlands Drywall Co. has provided drywall repair for homes and businesses in The Woodlands, Texas for 20 years. The wall damage you see has names we use every day. A doorknob or foot punched through the sheet calls for drywall hole repair, while hairline cracks above a door, rows of nail pops pushing small circles of paint outward, a dented metal corner bead, and tape lifting along a seam fall under drywall patching. Sheetrock repair is simply another name for the same job.
We fill the repair with setting-type compound, which hardens chemically rather than by drying, then seal the area with PVA drywall primer, a coating applied before paint. Our finishing follows ASTM C840, the trade standard for hanging and finishing gypsum board. The final step is matching the texture before you approve the work, and that texture matching shows on your estimate as its own line. Ceilings, water-damaged board, and plaster are covered elsewhere on this site.
The on-site look is free, your itemized written quote arrives within 24 hours, and a typical single-room repair runs $200 to $1,200. We are fully insured, and we work in Shenandoah, Oak Ridge North and Magnolia and across Montgomery and Harris counties. The finished wall should look like one unbroken surface. Call (346) 248-4075 or use our quote form.
Get A Free Quote
Types of Drywall Damage We Repair
Drywall is the pressed gypsum panel behind the paint in almost every room of a Woodlands house, and Sheetrock is a brand of drywall whose name became part of everyday use, so wallboard repair and sheetrock repair both refer to the same service. Whichever term you use, drywall repair starts with the same conditions: the board is dry, the wall around the break is sound, and only part of the drywall has failed. Five kinds of damage bring us out to make that repair. Ceilings and older plaster walls are quoted as separate work.
Doorknob Holes and Impact Damage
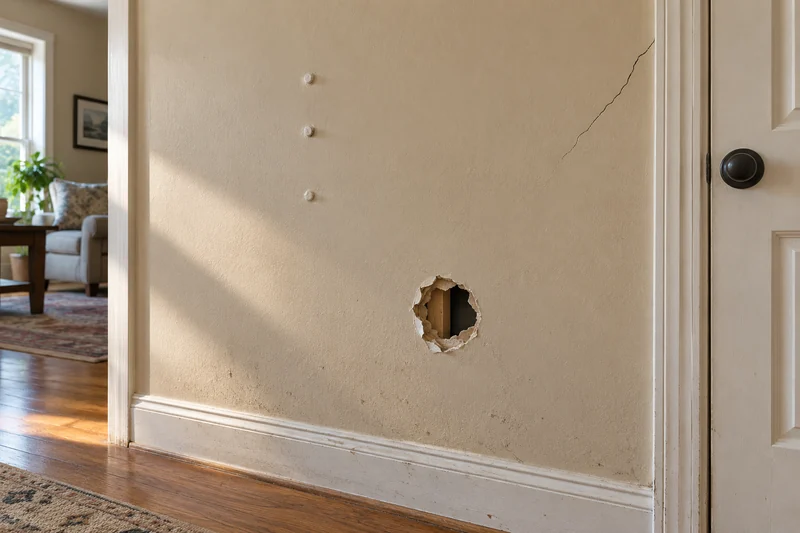
A door swung hard drives its handle through the wall, while furniture, ladders, and a misplaced foot during a move cause the same damage lower down. The paper face on the front of the panel tears first, and the gypsum core behind it crumbles back, so the break is usually wider than the hole you can see. Size, not price, determines how the repair is handled. A small opening takes a self-backed patch, a stiff square that holds itself across the gap, while a hole wider than your hand or a broken outside corner where two walls meet requires new board and becomes a longer drywall hole repair.
Nail Pops and Fastener Bumps
Nail pops are small round bumps in an otherwise flat wall, often surrounded by cracked paint and sometimes exposing the head of a drywall screw. The screw has backed partway out of the wooden stud behind the board while the drywall itself has stayed in place, which is why you can feel the screw head under your fingertip. Framing lumber swells and shrinks throughout the year, and that seasonal movement is the usual cause.
Simply filling the bump will not fix it because the screw is still loose. The drywall has to be refastened to the stud beside the pop before the surface is smoothed over. Nail pops also usually appear in a group running down the same stud line rather than as a single isolated bump.
Cracks at Seams, Corners, and Door Headers
Cracks appear in three common places, and the location of yours tells us something before we open the wall. A straight line running along the wall follows the taped seam between two drywall sheets, while a line climbing an inside corner follows the joint where two walls meet. Short diagonal cracks appear above the top corners of doors and windows. The pattern is a clue, not a verdict, so we read settling cracks on site first: a hairline crack that has stayed the same is a different job from one that has widened, and drywall crack repair starts with that assessment. Fine lines webbed across the paint are crazing in the paint film, not a break in the drywall.
Damaged Corner Bead on Outside Corners
Corner bead is the rigid strip buried under the finish along every outside corner, where it keeps the edge straight. Vacuum cleaners, furniture, and hallway traffic can dent it. Filling a damaged bead leaves the dent in place, so the repair rises back through the new coats as a shallow hump that catches the light along the corner and can be felt with a fingertip. We cut out the damaged length, install a new piece of metal, vinyl, or paper-faced bead, set it true, and check the entire height for straightness before finishing.
Peeling Tape, Bubbling, and Soft Spots
Peeling tape lifts along a seam in a long, straight line, while a blister under the paint shows where the tape never bonded to the board. Run a finger along that seam and the loose tape feels raised and hollow, with its edge catching under your nail. Both problems trace back to the day the seam was first taped, because tape set into too little compound lets go years later. A spot that gives under your thumb is different: the panel has lost its stiffness there, and water-damaged board is separate work that we quote on its own.
Free Quote FormWhen a Drywall Repair Costs More Than a New Sheet
A gypsum panel costs little compared with the hours of taping, coating, and sanding needed to make the repair disappear, so repair versus replacement comes down to how much finished wall has to be blended and how the surface will look once painted. Several holes in one sheet change that calculation, because drywall patching each one separately means blending several areas instead of one, and you should know that before either job is quoted.
How Big a Hole Changes the Answer
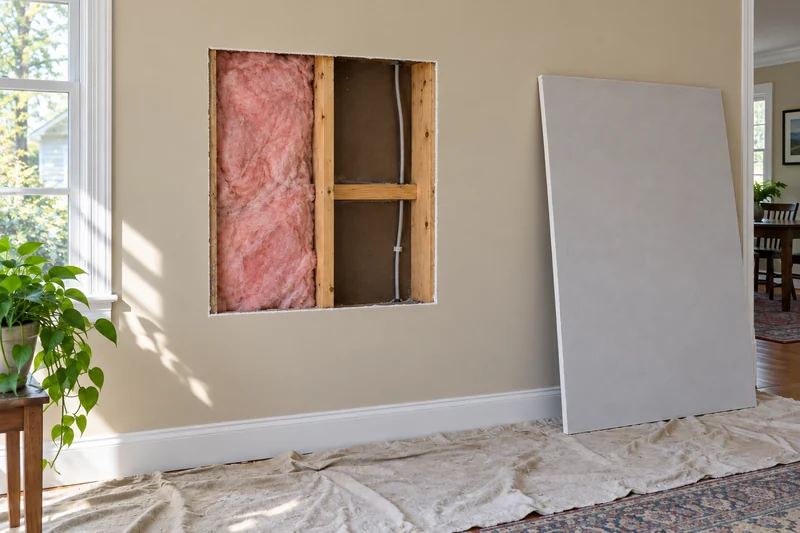
A nail hole or the hole left by a picture hook fills with joint compound and sands flush in a single visit. An opening about the size of a doorknob takes a self-backed patch with its own stiff center. For a wider hole, backing goes in first so the new piece has something solid to rest on. Wider still, we cut back to the framing on both sides so the edges land on a stud, with stud spacing determining how wide the opening becomes.
Drywall hole repair takes longer at each step because it adds coats, drying time, and more finished area to blend. As a result, patch size affects your price more than the amount of missing board.
When Replacing the Sheet Is Cheaper
Cutting out a whole sheet and hanging a new one sometimes costs less than patching it. That is usually the better choice when one sheet has several separate repairs, the damage crosses a seam into the next sheet, or an old patch sits proud of the wall after being skimmed over more than once. A full gypsum panel comes with two factory edges that are slightly recessed so the tape and joint compound finish level with the surrounding wall. Your written estimate tells you which approach applies to your wall.
Free Quote FormHow a Drywall Patch Is Made to Disappear
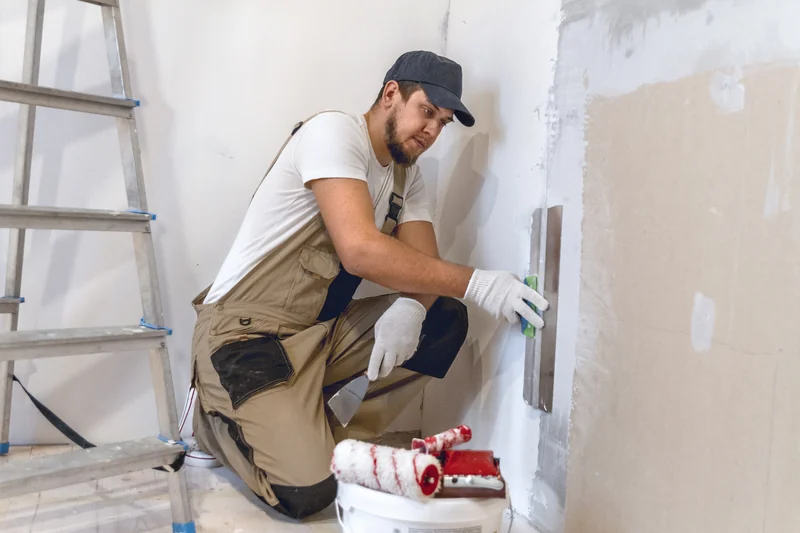
Drywall patching means cutting out the damaged board and building new material back in until the wall is flat again. In every drywall repair we make, we first bring the new piece level with the face of your wall, then spread each layer of compound wider than the one beneath it until the edge disappears into the surrounding surface. An invisible patch comes from that gradual widening, not from simply smearing compound over the repair. We cut back to solid board, back the opening, bed and coat the tape, then feather and sand the surface smooth.
Cutting Back to Solid Board
The paper face tears beyond the dent you can see, and the gypsum core crumbles behind it, so we cut back to solid board. We square off the opening because a square hole takes a square piece and closes along four straight joints, while a ragged opening leaves gaps that compound cannot bridge. We make the cut with a drywall saw or a scored and snapped utility knife. Before cutting, we locate the wiring and plumbing inside the wall cavity and keep the cut clear of the framing that supports the patch.
Backing the Opening So the Patch Has Something to Sit On
A patch that gives under your thumb a year later was never fastened to anything. Backing is a strip secured inside the wall cavity to give the new piece something to be screwed to. When the hole reaches framing on both sides, the studs provide that support; otherwise, we fit wood strips or metal clips to match the cavity. The backing also extends behind the solid board around the hole, holding the old edge and the new piece together. We set the new piece level with the face of the wall, because pushing it back behind the surface leaves a step that shows through every coat that follows.
Bedding the Tape, and the Coats That Follow
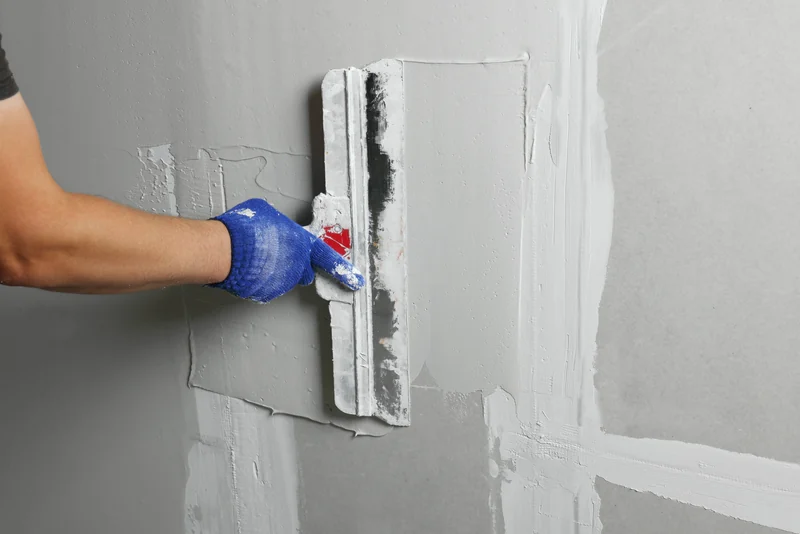
Two boards meeting at a joint will crack apart unless something spans them. Paper tape provides that support, but it holds only when it is bedded, meaning pressed into wet joint compound rather than laid over a dry surface. Self-adhesive mesh goes on dry and is then covered with setting-type compound, the fast-hardening kind that fills the weave; an all-purpose mix is too soft to hold there. Hot mud hardens through a chemical reaction rather than by drying, so two coats can go on your wall in one visit. Each coat after that is spread wider and thinner than the one beneath it, and the time each coat needs is built into the schedule from the start.
Feathering and Sanding So the Edge Has Nowhere to Show
Late-day light from a window crosses the wall at a low angle instead of hitting it head on. The trade calls this raking light, and it exposes any patch that was finished too narrowly. A wide blend keeps the repair from showing in that light, and feathering is how we build that width.
Each coat is spread farther out than the one before it and feathered to nothing at the edge, using wider knives on each pass, with ten- and twelve-inch knives for the final coats, until the blended area is several times larger than the hole. We use vacuum-assisted sanding for the final smoothing, then prime the repair with PVA drywall primer. Matching the surrounding texture is the last step before you inspect the wall, and it is priced as its own line on your estimate. Texture work by itself is a separate job.
Why a Drywall Repair Comes Back
A repair that reappears rarely failed at the surface you can see. The problem started in a step underneath, and the shape of the failure on your wall points to which step went wrong. Shrinking, ridging, and telegraphing each come from a different drywall repair error, and those common mistakes are what we look for before touching an old patch. We diagnose the patch failure first, then decide how much of the earlier work needs to be removed.
Patches That Shrink and Crack Within Months
Drying-type joint compound contains water, and as that water leaves the mix, the filled area pulls in tighter than it was when applied. That is why we use setting-type compound for a deep fill. If drying-type compound is laid on too thick in one pass, it shrinks away from the cut edges of the hole, leaving a fine map of hairline cracks across the repair within months. Sanding or painting before the compound has cured traps that same movement under the finish. Adding another coat on top only repeats the problem, so drywall patching that has cracked this way has to be taken back out and refilled in thin passes.
Ridges, Bulges, and the Patch You Can See From the Doorway
A patch that sits above the wall face cannot be made level by adding more compound. Each skim coat used to hide the high spot only spreads it farther out, so the bulge grows with every attempt. What you see is an outline around the old repair or a shallow dip under the paint where the light changes. Before any work starts, we find visible old repairs by laying a straightedge across the patch and running raking light along the wall. A proud patch is cut out and rebuilt level with the surrounding board.
Free Quote Form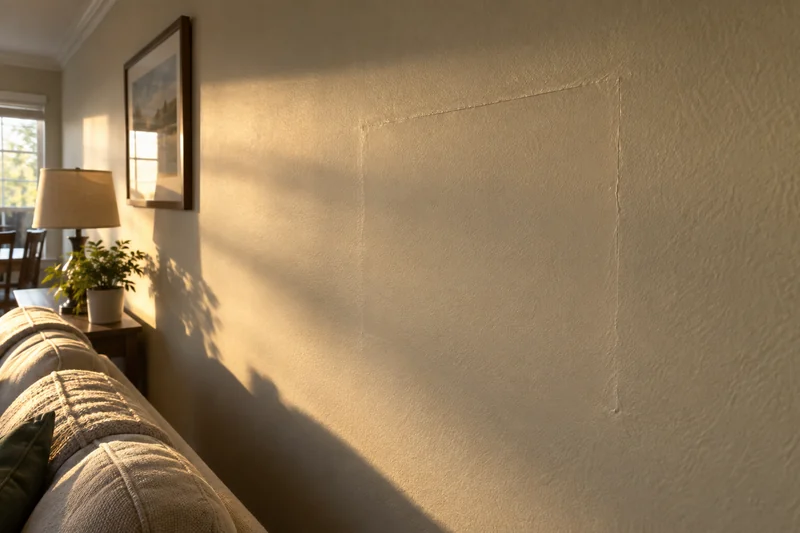
Tape That Lifts and Edges That Show
Paper drywall tape holds only when it is pressed into wet compound. If the tape is laid over a dry surface, it never bonds, and months later the result is peeling tape at one end of the seam. An edge feathered too narrowly leaves a visible line whenever side light crosses the wall. Bare compound also absorbs paint differently from the drywall paper around it, so an unprimed patch dries to a dull shape you can spot from across the room. That dull shape is called flashing. PVA drywall primer evens out how much paint the surface absorbs, and we prime every repair we finish.
Dust Control and Cure Time on a Repair Visit
Dust control and cure time determine what a drywall repair costs your household in mess and in days. Sanding dust travels, and the compound hardens on its own schedule, so we plan for both before a tool comes out of the van. That way, the time we spend on site is part of what you are booking from the start, not something you discover halfway through the job.
Containment and Vacuum-Assisted Sanding
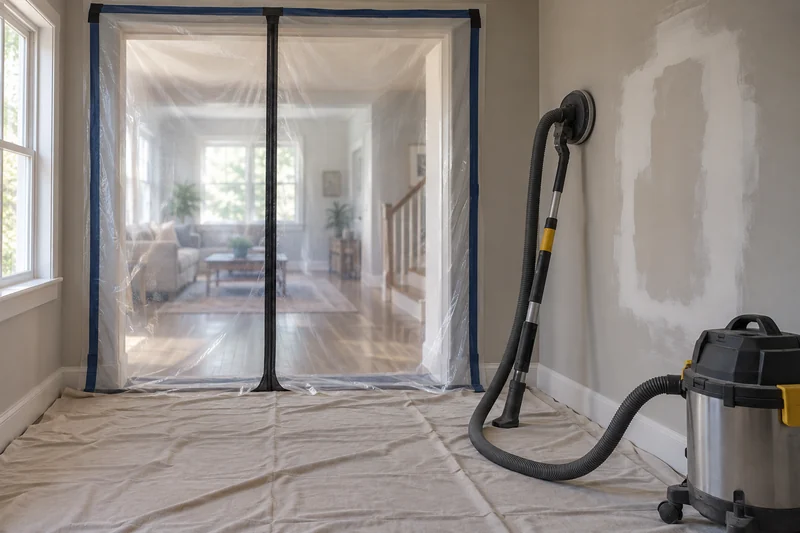
Sanding turns hardened compound into a fine powder that settles on every surface in the room, so we use vacuum-assisted sanding to catch the dust where it is created. The sanding head connects to a hose, and the vacuum draws the powder in as it comes off the wall. Before sanding begins, we cover the floors and furniture with drop cloths and seal the work area off from the rest of your home with plastic sheeting taped across the doorways. Once the sanding is finished, we remove the coverings and take the debris with us that same working day. No repair is completely dust-free, so we contain the dust in one room and remove it when we leave.
One Visit, or Two Days on Site
How long we are on your property depends on how long the compound takes to harden, not on the size of the damage. Every coat has a cure time, the hours it needs to dry through before the next coat can go over it, and that wait is the same for a small patch as it is for a wide one. A single patch is usually a one-visit job with a firm appointment, and setting-type compound is what makes that possible.
Repairs spread across several areas take one or two working days. Once we have seen the affected area, we set the schedule so the date you are given reflects both the amount of damage and how soon you need the room back.
Why Choose The Woodlands Drywall Co. for Drywall Repair
About half of our work is residential drywall repair, and that is why you would call us rather than a remodeler who patches walls between larger jobs. Blending a repair into a wall that is already painted and lived in takes a different skill from hanging board in an empty house, and it is the work we practice most weeks of the year.
- Fully insured: we carry full insurance for both residential and commercial projects.
- The Woodlands Drywall Co. has served The Woodlands, Texas, for 20 years.
- We inspect the site in The Woodlands at no charge and deliver an itemized written quote within 24 hours of the visit.
- We offer same-day and next-day drywall repair when openings permit, with scheduling based on the size and urgency of the damage.
- Financing is available for qualifying work.
- The estimator who walks your job runs the crew that does it, so the scope you were quoted is the scope the crew works to.
- Vacuum-assisted sanding holds the dust at the tool, and cleanup is priced into the job rather than left to you.
- Cure time between coats sits in the schedule we hand you, not in a delay you hear about on the day.
Call us at (346) 248-4075 or send your project details through the quote form to get a free estimate.
What a Drywall Repair Costs in The Woodlands
Most residential drywall repair in a single room costs between $200 and $1,200. The range is wide because a small patch and a wall rebuilt around fresh board involve very different amounts of work, so the price follows the repair itself rather than the floor area. For that reason, we quote repairs by the job, while a full installation is priced by the square foot. Drywall repair cost depends on how much board has to come out, how much finishing has to go back on, and how much of the room the crew needs to work through.
What Moves the Price of a Repair
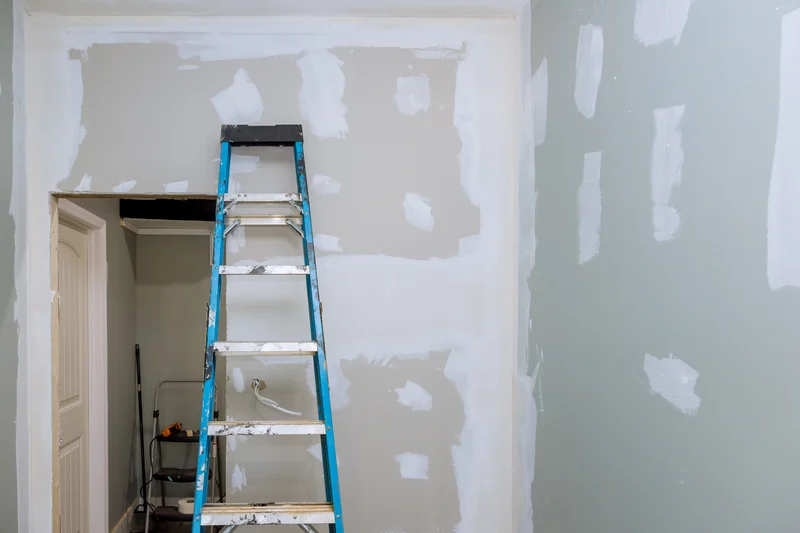
The number and size of the damaged areas come first, because each separate spot needs its own cut, its own new board, and its own coats of compound. Height comes next. Overhead work takes more time and effort than work at chest height, so repairing the same damage on a ceiling costs more labor than repairing it beside a light switch. A heavily textured surface, or one that has been painted many times, adds hours because the new finish has to match what is already there. A bathroom or laundry room may also require moisture-resistant board, which costs more than standard panels.
If you have several repairs waiting, booking them together keeps the cost down. We protect the room once and mobilize the crew once, so the setup cost is shared across all of the repairs instead of being charged more than once.
What the Written Estimate Shows You
Your estimate is itemized so you can see exactly where the price comes from. Board replacement, finishing, and texture each appear on their own lines, and any specialty materials a room requires are listed separately as well. Priming is included with every repair, while finish painting is an optional line you can accept or leave off without changing the rest of the work. This line-item estimate shows you which stage of the repair accounts for each part of the price. To get one for your own repair, call us at (346) 248-4075 or send the quote form.
Free Quote FormYour Drywall Repair, From First Call to Final Walkthrough
The Woodlands Drywall Co. follows the same five-step process on every drywall repair, so you do not have to explain the job again to someone new halfway through the work. We also do not commit to the repair until someone has stood in the room and looked at the wall in person.
-
Call or Send the Details
Tell us which wall is damaged, which room it sits in, and roughly when it happened. One call books the free estimate, and the quote form takes the same project details if writing them out suits you better. Photographs are welcome with either.
-
A Free On-Site Look and a Written Estimate
Nothing is charged for the visit itself. Within 24 hours of that visit you have an itemized written quote in hand, priced from what we saw on your wall rather than from a description given over the phone.
-
Protection Before Tools
Before a knife comes out, your room is covered and shut off from the rest of the house, so the mess stays where the work is. Dust control begins here, ahead of the mess rather than behind it. You are given a firm start date at this point, not a window of days to wait through.
-
The Repair, Then the Coats
Board work happens first, then the coats that go over it. Cure time between coats is already written into the schedule, so the finish date we gave you is the date we work to. The texture on the repair is matched to the surface around it before you are asked to approve anything.
-
Walkthrough, Punch List, Invoice
We walk the room with you at the end, and that final walkthrough is where anything you want corrected goes onto a punch list. Those items are settled first. The invoice comes after them.
Step one is still a phone call. Call us at (346) 248-4075, or describe the damage through the quote form, and we will arrange the visit from there.
Patching Drywall Yourself, and Where It Usually Goes Wrong
Some wall damage is well within a homeowner's reach, while other damage is better left to a professional. What determines that is not how difficult the work feels, but whether the filled area disappears into the wall around it. A wide blade spreads the same filler over a larger surface and feathers it into a shallow taper instead of leaving a mound, so knife width is what determines whether the patch shows. That is where most drywall patching done at home falls short, and it is the clearest reason to call us for a drywall repair you were otherwise willing to finish yourself.
Repairs Worth Doing Yourself
Nail holes, the puncture left by a picture hook, and a shallow dent that has not torn the paper covering the board are all repairs you can handle yourself if you want to. Lightweight spackle is a soft filler that dries quickly and sands with little effort, and a putty knife is all you need with it for any of these repairs. Press in one thin coat, let it dry, and add a second if the first coat sank as it hardened. Then sand gently with a sanding sponge, working a little longer than feels necessary. Two thin coats, properly sanded, leave you nothing to look at.
Where a Home Repair Starts to Show
A self-adhesive patch is a stiff mesh square that sticks over a hole, but if the compound is skimmed only as wide as the square, the repair leaves a raised outline you can still feel with your fingers a year later. Sanding too hard creates the opposite problem: the compound wears through and roughens the paper face underneath, so anything applied afterward sinks into the fuzz.
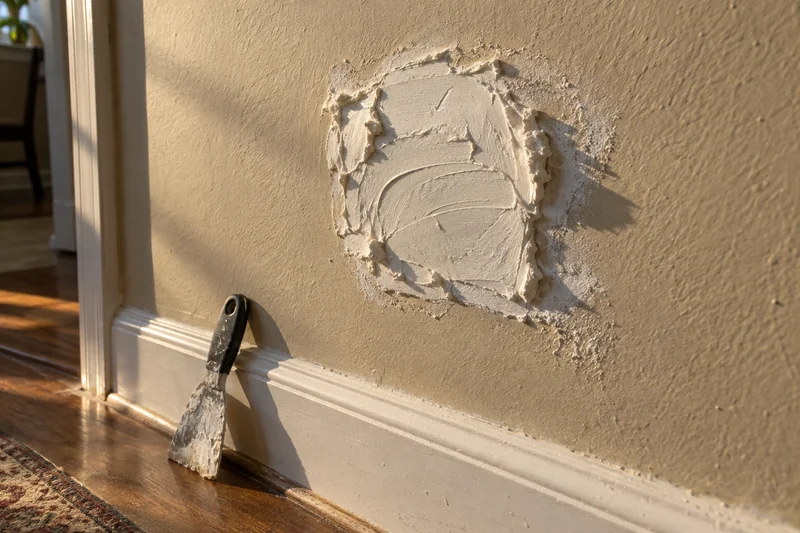
Paint also soaks unevenly into bare compound and leaves a dull shape, which is why every patch gets primer before any color goes on. Texture matching is the final step of the repair and carries its own line on the estimate. Whether you can find the patch later comes down to how well its edge was blended.
Free Quote FormHumidity, Slab Movement, and the Drywall Cracks They Open
The Woodlands has a humid subtropical climate, with summer highs near 94°F and winter lows near 40°F. The wood framing behind your walls swells during the damp months and shrinks during the dry ones, and that seasonal movement pulls the same seams and corners open year after year.
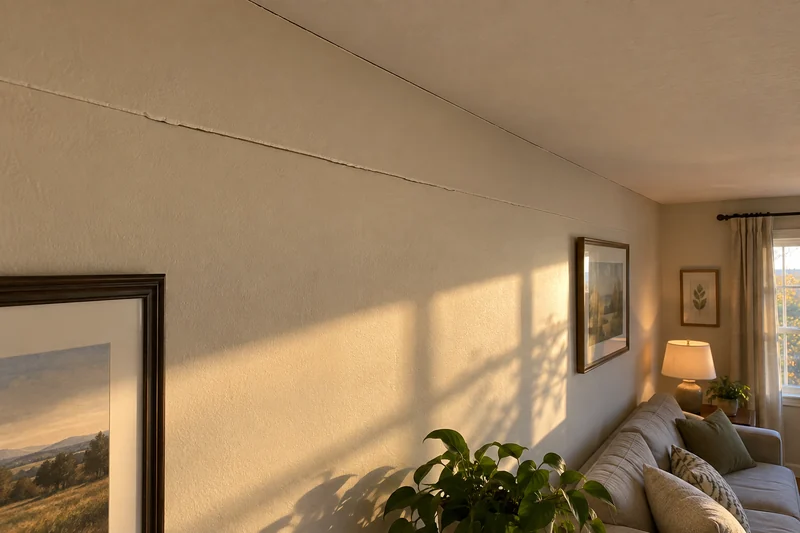
Much of Montgomery County also sits on expansive clay, which shrinks during drought and swells again after heavy rain. The slab poured over that clay moves with it, and the walls standing on the slab move too. A slab can move in several ways, including center lift, where the middle sits higher than the edges. Indoors, the usual sign of slab movement is diagonal cracking at the corners of doors and windows, but the direction of a crack is a clue, not an answer.
Cracks That Come Back Every Season
A thin line that returns in the same place each year points to a joint that keeps moving, not to failed filler. Rigid filler packed over that moving joint hardens in place, and the next change in humidity splits it again. Drywall crack repair on a moving joint means cutting the joint out and re-taping it with drywall tape and joint compound, giving the seam more room to handle that movement. The movement continues, so we will not tell you the crack is gone for good.
Cracks Worth a Second Opinion
Some patterns point past the wall surface to the building holding it up. A crack that keeps widening instead of reopening at the same width, one with a lip where a side stands proud of its neighbor, and doors and windows in one room that stop closing all belong in that group. We do not diagnose foundations or structures. Wider, recurring, or displaced cracks can warrant evaluation by another qualified professional, and we will tell you when we see one. The settling cracks that are cosmetic, we fill and finish.
What a Drywall Repair Visit Includes, and What It Does Not
Your estimate separates the work included as standard from work priced on its own line and work that belongs to another trade. Organizing a drywall repair this way puts the scope you approve in writing instead of leaving any part of it assumed.
Included in Every Repair
Some work is included in the price of every repair because it is never optional. Your floor and furniture go under drop cloths, and the work area is closed off, before a tool comes out. The board work, taping, and finish coats come next, and once the compound is sanded, we clean the room and carry away the project debris instead of leaving it with you. Every repaired surface is then sealed with PVA drywall primer, which is included with every repair and does not appear as a separate line item. Before we invoice you, we walk through the finished room with you.
Its Own Line, or Another Trade
Other work sits alongside a repair without being included in it, and that work is either priced separately or left off the estimate. Finish painting is optional and appears on its own line when you want it, as do specialty board when a room requires it and a whole-room re-texture. Blending texture across the patch itself is part of the repair. Electrical, plumbing, and flooring belong to other trades, and we tell you which trade the job needs. Ceilings, wet board, plaster, and popcorn removal are drywall services we handle separately, each with its own price.
Repairs in a Garage or a Wet Room
A garage ceiling with living space above it, along with the garage side of the wall separating the garage from the house, is what the code calls a fire separation rather than an assembly with an hourly fire-resistance rating. The requirement appears in IRC R302.6, which specifies a different panel for each location. Habitable rooms above the garage require 5/8-inch Type X, while the garage side of the wall requires 1/2-inch gypsum board. Type X is fire-rated board with a reinforced core that holds together longer in a fire.
Replacing that board with less than the code requires quietly downgrades the fire separation, and an inspector may look for it later. In a bathroom or laundry room, the repair takes moisture-resistant board, which is different from the tile backer used behind a shower or tub surround. Whatever board your repair requires, we identify it on the estimate.
Free Quote Form
Where Our Drywall Repair Crews Work
Wood framing swells when the air is damp and shrinks again as it dries, and that seasonal framing movement affects every house in our service area the same way. The homes here were built in the same decades, by the same builders, with the same board and fasteners, so drywall repair calls from one neighborhood describe the same problems as the last: a hairline crack over a door, a seam opening near the ceiling, or a row of bumps running down a stud. Your address changes our drive time and very little else.
Our crews serve all eight villages of The Woodlands, along with surrounding communities in Montgomery and Harris counties. The Woodlands Drywall Co. sends the same crews to every location listed here.
Communities The Woodlands Drywall Co. Serves
Villages of The Woodlands:
- Alden Bridge
- Cochran’s Crossing
- College Park
- Creekside Park
- Grogan’s Mill
- Indian Springs
- Panther Creek
- Sterling Ridge
And the surrounding communities:
- Conroe
- Atascocita
- Spring
- Porter
- New Caney
- Humble
- Kingwood
- Tomball
- Willis
- Pinehurst
- Shenandoah
- Oak Ridge North
- Magnolia
Drywall Repair Questions We Hear
How much should a drywall repair cost?
A single-room repair usually costs between $200 and $1,200. Your drywall repair cost is based on the job rather than the square footage, so damage in three rooms is quoted as one visit instead of multiplying that range by three.
Can I patch drywall myself?
Yes, for nail holes, picture hooks, and small dents; lightweight spackle fills those in minutes. With drywall patching, the blend is what gives the repair away, not the fill, so use a knife wider than feels necessary. A narrow knife leaves a ridge that will show in side light.
Is it cheaper to repair or replace drywall?
One damaged area is usually cheaper to repair. Several repairs in the same gypsum panel change the calculation because board is inexpensive compared with the finishing around it, so drywall replacement of the whole sheet can cost less than patching four separate areas. When the two options are close in price, we quote both.
How do you estimate a drywall repair?
We inspect the damage on site at no charge, then send you an itemized estimate within 24 hours. We price the job by the number of damaged areas and the finished area we have to blend, not by the wall's square footage, which is why two holes of the same size can have different prices.
How big of a hole can you repair in drywall?
No hole is too large for drywall hole repair; the method simply changes as the opening gets bigger. Under about a hand's width, the patch carries its own stiffener. Beyond that, it needs support fixed inside the wall cavity for the new piece to rest on. Past a certain size, the main change for you is the schedule: the job gains a day for coats, not a higher rate.
Do hairline drywall cracks need repair?
A hairline crack that stays the same width is cosmetic, and filling and feathering are all that drywall crack repair requires. If you are unsure, mark both ends of the crack with a pencil and check it again in three months. If the crack is still sitting between those marks, it is behaving cosmetically.
What are the common mistakes when patching drywall?
Drywall patching that has to be redone usually comes from three habits: applying compound too thick in one pass, feathering the edge too narrowly, and painting over bare joint compound without PVA drywall primer. All three come from the same rush to finish the wall in one day, with heavy compound applied first, paint going on before it has dried, and primer skipped altogether.
Get Your Wall Looked At by The Woodlands Drywall Co.
A drywall repair starts with somebody standing in front of the damage. We come out across Montgomery and Harris counties, look at what you have, and send a line-item estimate within 24 hours that prices each part of the work. Call The Woodlands Drywall Co. at (346) 248-4075 or use our quote form to request your free on-site estimate.