
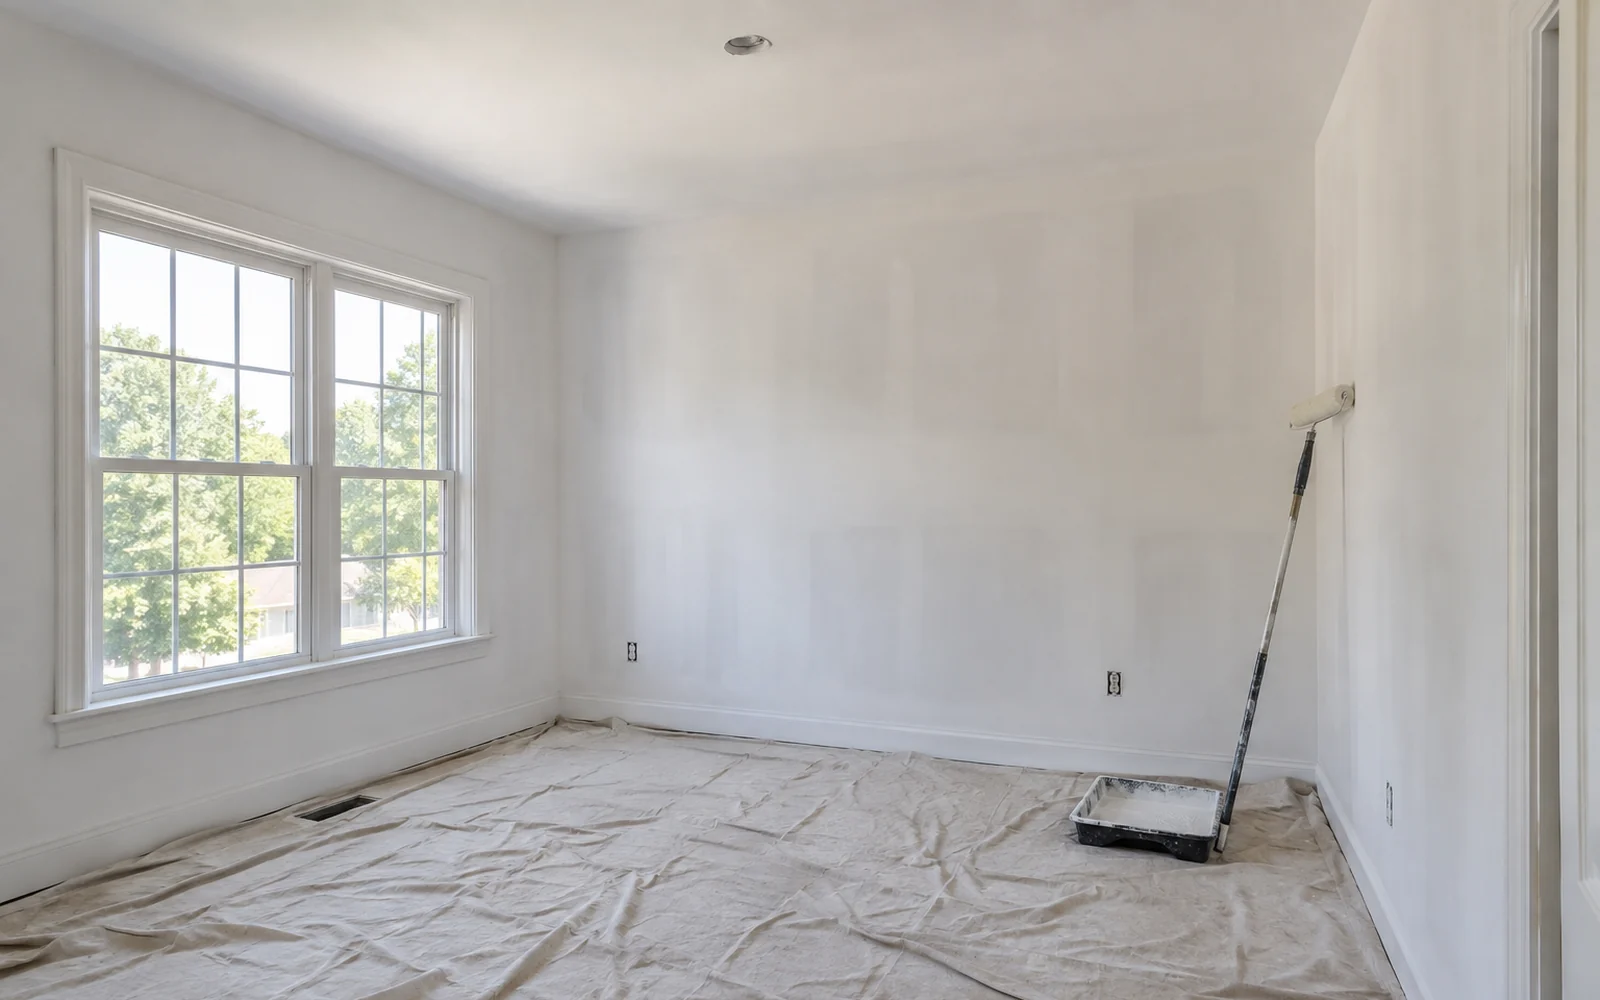
Drywall Priming & Painting in The Woodlands, TX: PVA Primer and Paint-Ready Walls from The Woodlands Drywall Co.
The Woodlands Drywall Co. has spent 20 years handling drywall priming and painting for homeowners, landlords and property managers across The Woodlands, Texas. Priming and painting new drywall is the stage where a finished wall moves beyond repair work and becomes a surface you can live with. We sand the wall smooth, remove the dust left behind, and roll drywall primer over both new board and patched areas. We use PVA primer on fresh board. A single patch can be sealed by itself through spot priming, or an entire room can be primed from corner to corner, and you choose which approach fits the job.
Drywall priming is included with every repair and installation we complete, so the wall we leave behind is a paint-ready surface. Drywall painting in your finished color is optional and appears as a separate line on the estimate. Before any coating goes on, we rake light across the wall to check the surface, use a HEPA vacuum for dust control, and account for dew point and the recoat window.
We prime and prep walls throughout Montgomery County, including Shenandoah, Oak Ridge North and Magnolia. You know exactly which coat is the last one included before the crew arrives. Call The Woodlands Drywall Co. at (346) 248-4075 or use the quote form to request a free on-site estimate.
Get A Free Quote
Drywall Priming & Painting: Why New Board Cannot Be Painted Straight
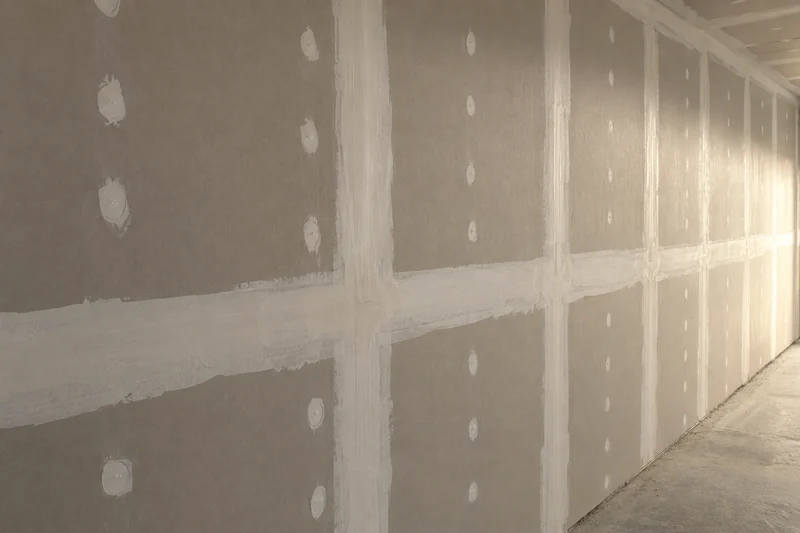
A taped wall reaches you looking like one flat surface, but it is actually made up of two materials. Most of what you see is the paper face of the gypsum board, the heavy paper skin the sheets arrive wrapped in. Running through that surface are the seams and screw holes, filled and sanded smooth with joint compound, a soft plaster-like filler that dries hard. Because those two materials sit flush with each other and reflect light the same way, a bare wall gives you no visible clue where one ends and the other begins.
They do not absorb a coating the same way, which is why the work on new board runs as a two-stage job rather than one.
Paper Face and Joint Compound Drink Paint Differently
Freshly sanded joint compound is open and thirsty. Sanding leaves the surface slightly powdery and full of tiny voids, so it draws in liquid about as readily as bare gypsum, the raw board face with nothing on it at all. The paper face of a finished sheet is comparatively closed, with its fibers pressed tight at the mill, so it keeps a coating nearer the surface. The trade calls this pull suction, and it is a property of each material rather than a mistake made during hanging or taping.
Because the seams and filled screw holes pull harder, the same coat of paint sinks farther into those areas than into the plain wall around them, leaving less paint on the surface where you can see it. The color you chose then reads at two different depths across the same wall, lighter or duller over every filled area and fuller everywhere else. A coat of drywall primer evens out that pull before any color goes on.
Self-priming paint does not solve this on bare gypsum. It contains more binder, the glue that holds the pigment together and fixes it to the wall, than ordinary paint, but it is still a single coat meeting two different appetites, so each surface absorbs it at its own rate just as it would any other coat.
Joint Photographing: The Stripes That Appear After the Color Coat
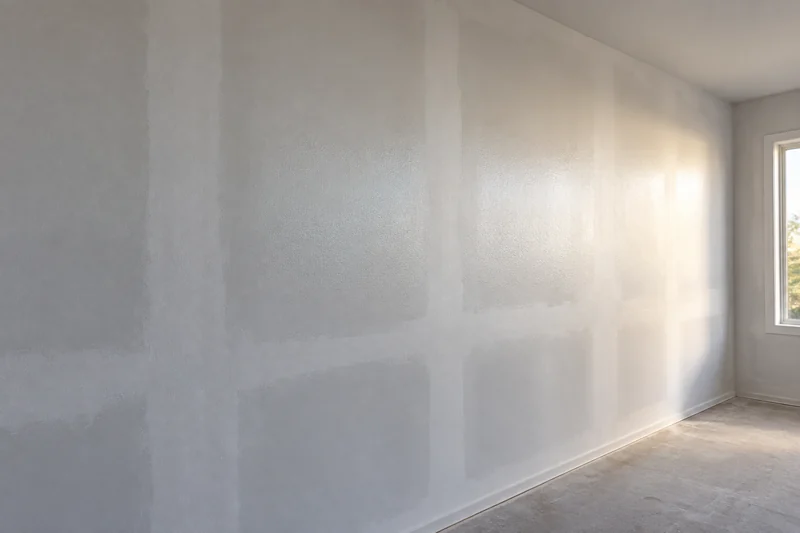
When the seams show through the finished color, the trade calls it joint photographing, or joint flashing. The bands follow the taped seams exactly, and they are usually not a different color but a different sheen. Paint over the compound sinks in and dries flatter, while paint over the paper stays nearer the surface and keeps more of its shine. Because sheen is what your eye picks up, the seams appear as dull stripes against a slightly brighter field.
Whether you notice it depends on where the light comes from. Light striking the wall head-on tends to hide the difference, while light traveling along the face of the wall from a window at the end of a room or a fixture mounted close to it catches every change in sheen and makes the seams plainly visible. That angle is called critical lighting, and it is why a wall can look right at midday and show every joint by five o'clock.
Adding more color will not fix it. Two finish coats, or even three, still sit over the suction difference underneath, while drywall priming evens out that difference before the color goes on. How flat the surface was finished in the first place also affects the result, and finishing and texture work is a separate service rather than part of priming.
A Patch Is the Same Problem in Miniature
A repair in a wall you already live with creates the same mismatch in a smaller area, and often a sharper one. The patch is fresh compound, just as thirsty as the day it was sanded, while the aged paint film around it has cured and tightened for years and absorbs almost nothing. Put your color straight over that patch and it leaves a visible shape, brighter or duller than the surrounding wall, exactly where the damage was.
Spot priming solves this wherever the paint around the repair is sound. We apply drywall primer over the patch and extend it past the edges onto the surrounding paint, so the repaired area no longer absorbs differently from the wall around it and the whole section becomes one paint-ready surface. Priming is part of the repair work just as it is with new board. How completely the touched-in color then blends into the older paint around it is a separate question, and that depends on how the existing paint has aged.
Free Quote FormWhere Our Drywall Priming & Painting Scope Ends
Primer is the last coat we apply on a repair or installation. Every drywall priming and painting job we quote includes it, so the wall you get back is sealed and ready for color. Color itself is optional work, and it appears on your estimate as its own line rather than folded into the repair price.
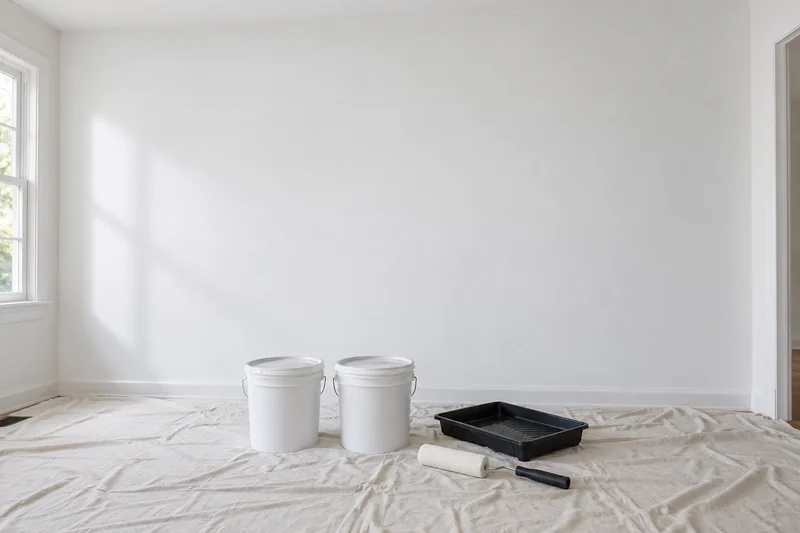
You have two options, and we price both the same way: our crew can continue and paint the room, or we can hand the wall over primed and ready for someone else to finish. Choosing the second option does not mean the priming has to be done again later. We do not offer help choosing colors or recommend how glossy your paint should be, because those are decorating decisions rather than drywall ones. We seal the wall and leave the color decision to you.
Primer Is Included, Finish Painting Is Quoted Separately
Your written estimate separates the job into labor, materials, the agreed finish level, meaning the grade of smoothness the wall surface is taken to, and any optional work. Priming is included in the repair or installation price, while finish painting, if you want us to handle it, is listed beside that price so you can see exactly what it costs on its own.
Splitting the two lines is the clearest way to price drywall priming and painting: the sealing coat belongs to the repair, so you are never billed for it twice, while the color coat is optional work you can decline without changing the repair price.
What You Are Handing Your Painter
A primed wall reaches your painter sealed, sanded, free of dust and even in suction from one end to the other, giving them the paint-ready drywall they need to price the room accurately and apply color without stopping to correct the surface first. Bare or patchy board absorbs color unevenly, which usually means an extra coat and additional sanding the painter expected to be finished already. A paint-ready surface removes that variable from their estimate. You can check it yourself before we leave: the whole surface should show one flat, even color with no seams showing through. The primer sits on the finish level named in your estimate.
Sanding, Priming and What Primer Hides
Four steps stand between a taped wall and a room that is ready for paint, and none of them involve color. Each one prepares the surface: smoothing the dried compound, removing the dust that sanding creates, inspecting the wall closely, and sealing it with a coat of drywall primer. You will not see any of that work in the finished room, which is exactly the point. When all four steps are done properly, the color coat has nothing left to reveal; when one is skipped, the wall shows it as soon as you switch on the first lamp.
Sanding to a Feathered Edge, and Why the Dust Has to Go
Sanding drywall is not about making the whole wall smooth in a general sense. Joint compound sits slightly proud of the board around every seam and screw, and the job is to bring that raised area down until its outer edge thins away to nothing instead of ending in a ridge you could catch with a fingernail. That thinned-away edge is a feathered edge, and it is what separates a wall that looks like one flat plane from one with faint raised outlines around the finished areas.
We work broad, flat areas with a 9-inch pole sander, an abrasive pad on a swiveling head at the end of a handle, so each pass covers a wide band with even pressure. Drywall is sanded before painting every time, and skipping that step saves you nothing because primer follows the shape underneath rather than filling it. If your wall is getting texture, it goes on after sanding and before any sealer, and that work is part of our finishing and texture service.
Sanding leaves drywall dust behind, and dust left on the wall creates its own defect. Primer needs direct contact with the board and joint compound to grip properly, while a layer of loose powder between them gives it an unstable surface instead. We remove the dust with a vacuum fitted with a fine filter, then wipe the wall with a damp rag to pick up what the vacuum leaves behind. That fine powder is hard on an ordinary household vacuum cleaner, so it is better to leave the cleanup to us than reach for yours.
PVA Primer: What It Is and What It Does
PVA stands for polyvinyl acetate, and PVA primer is a water-based drywall sealer made for new gypsum board and fresh compound. That is where it belongs and where it performs best. It brings both surfaces to roughly the same level of suction, so the color coat that follows meets one consistent wall rather than two different materials. It is not paint, it carries no finish color you would choose, and it does not repair defects. Sealing a bad joint only leaves you with a sealed bad joint.
A primer coat goes on faster than a color coat because it only needs a thin film, and primer costs less per gallon than finish paint.
Spot Priming a Repair Versus Priming Corner to Corner
When only part of a wall has been opened up, you have a choice about how far the primer should go. A single small patch in a wall with sound, reasonably recent paint can be spot primed and the color touched in over it. Several repairs on the same wall, or paint that has faded unevenly, point the other way, toward priming and repainting from one corner to the other. Paint changes as it ages, so a fresh touched-in area surrounded by an older finish will show a different sheen under raking daylight no matter how carefully it was primed. Corner-to-corner work costs more, and we tell you that when we recommend it rather than afterward.
Raking Light: Checking the Wall Before It Is Sealed
A raking light is a work light held close to the wall and aimed along its face rather than straight at it. Light traveling almost parallel to the surface casts a long shadow from anything that stands proud and darkens anything that dips inward, making ridges, hollows and missed sanding easy to spot while they still take only ten minutes of hand work to correct.
We carry out this drywall inspection after sanding and before primer, deliberately in that order. A ridge found after the sealer goes on has to be sanded back and primed again, and waiting for that second coat takes longer than correcting the defect beforehand. You are welcome to be there for the inspection and see the wall the same way we do before it becomes a paint-ready surface.
Keeping Drywall Dust Out of the Rest of the House
Sanding the filled seams smooth creates the finest dust of any stage of residential construction, and it is light enough to remain in the air long after the sanding stops. Because most of this work happens while you are still living, cooking and sleeping in the house, we plan dust control before the job begins rather than dealing with it after the wall is finished.
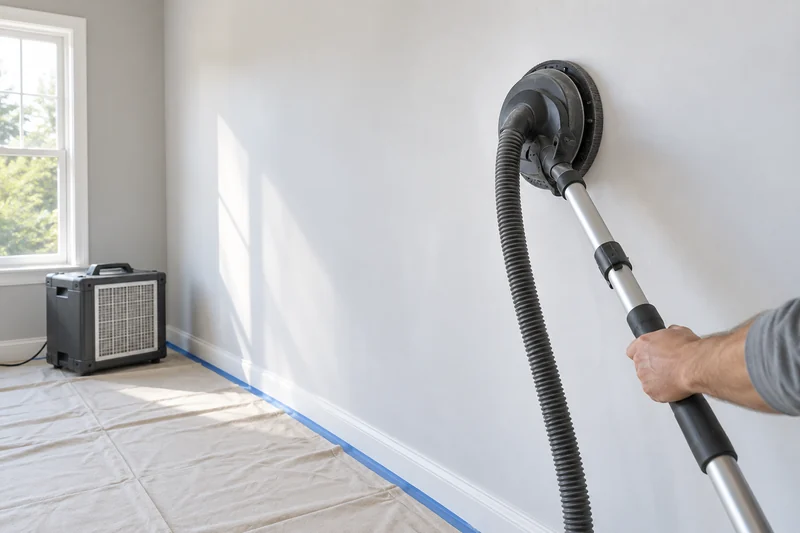
Containment, Vacuum Sanding and the State of the Room at Five O'Clock
We close off the work area before sanding begins. Plastic sheeting goes across the doorways, the floor is covered, and we seal the supply and return vents in the room. If a vent is left open, your air handler can pull the dust in and carry it through the ductwork into every other room in the house.
We sand with a vacuum attached at the sanding head, which pulls dust from the wall as it is created instead of releasing it into the room. Vacuum sanding leaves far less dust in the air to settle, but it does not clean the room by itself, so we clean the work area at the end of each day rather than leaving it until the following morning. In an occupied house, all of this dust control is included in the base scope of the job.
Why Loose Dust Ruins a Coat You Have Already Paid For
Dust that is still floating when the drywall primer goes on settles into the wet coating and dries there, leaving a gritty surface that has to be cut back smooth and coated again. Dust resting on the board creates the opposite problem, because the primer sits on the powder instead of soaking into the paper beneath it. That is why cleaning the room is the first step of the coating work. Once the wall is primed, run your hand flat across it: the surface should feel smooth and slightly chalky, with no grain under your palm.
Free Quote FormPrimer Drying Time in a Gulf Coast Summer
The Woodlands sits in a humid subtropical climate, and the air here holds enough moisture that anything drying by evaporation gives up its own water more slowly. Evaporation is the only way the filler over your seams loses moisture, and it is the main way a coating hardens, so both are waiting on the same humid afternoon air.
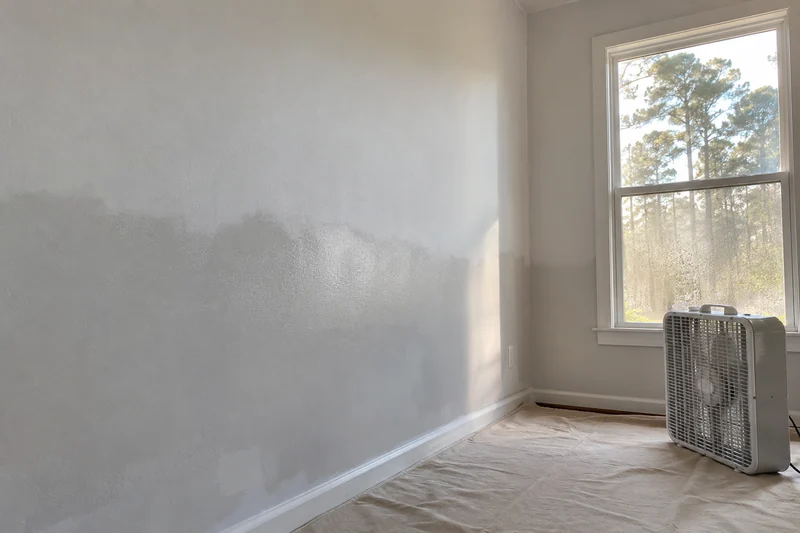
Heat alone does not decide it either way. Relative humidity drops as the day warms, so a hot afternoon near 94 degrees Fahrenheit is usually the better time to apply coatings, while a still, damp morning is the worse one. Indoors, the bigger factor is your own air conditioning, which pulls moisture out of the house and does more for a drying wall than the forecast does.
Compound Has to Be Dry All the Way Through Before It Is Sealed
The lightweight joint compound spread over your seams does not harden through a chemical reaction. It dries by releasing water into the room, and until that moisture is gone, the surface will soften again if anything wet touches it. Apply drywall primer while the compound is still damp and that moisture becomes trapped under the coating, where it keeps the film soft and can cause it to lift later. Drywall drying time between the last coat of compound and primer usually runs 24 to 48 hours, and heavy air stretches that further. When the timeline genuinely cannot bend, we use setting-type compound instead, which hardens on a fixed clock rather than at the mercy of the humidity.
Dew Point, Humidity and the Recoat Window
Coating manufacturers publish the conditions their products need. Most cap application near 85 percent relative humidity and require the wall to stay at least 5 degrees Fahrenheit above the dew point, the temperature at which moisture in the air condenses onto a cool surface. Outside those limits, the film stays soft, and a second coat applied too soon can sag or blister. That means the wait between coats gets longer, not shorter, in a closed-up, humid room, and we build the schedule around those conditions. If the house is air conditioned, we ask that you keep it running, which is the simplest way to help the job keep moving.
Why Choose The Woodlands Drywall Co. for Priming and Paint Prep
One crew takes the wall from bare studs or damaged board all the way through to a paint-ready surface, and that same crew seals it. That continuity matters because the person rolling the primer already knows where setting-type compound was applied heavily and where a seam had to be rebuilt twice. When preparation and sealing are split between two companies, a flaw found under the first coat can turn into an argument over who caused it, with you left standing in the middle. Nothing changes hands here, so that problem never gets a chance to start.
Three habits come with that arrangement on every job we handle:
- Containment and clean-down are included in the quote for an occupied-house job from the start, never added later as an extra for you to approve.
- Drying time is built into the schedule from the first day instead of appearing as a delay halfway through the job.
- The estimator who walks through your rooms is the same person who runs the crew working in them.
Texas does not issue a state license for drywall or painting work, so no contractor in this trade has a license number for you to verify. What you can ask any contractor to provide is proof of insurance. We are an insured drywall contractor carrying full insurance for residential and commercial projects, backed by 20 years of drywall priming and painting in The Woodlands.
Call us at (346) 248-4075 to schedule your free on-site visit.
What Priming and Painting Costs
Priming and painting drywall breaks into two parts that appear on your estimate differently. The sealing coat over sanded board and repairs is already included in the job you are buying, so there is no separate drywall priming cost listed below it. Finish color is the part with its own price. Because every room has a different size and amount of trim, that price comes from your own walls during the visit rather than from a generic rate on a page, and what follows will help you estimate roughly where yours will land.
What Is Already Inside the Number You Were Quoted
Accepting a repair or installation price here includes four things beyond the patching or board itself. We sand the filled seams flat, remove the dust from the wall and the room, supply the PVA primer, and spend the time rolling and cutting it in. A whole room of new board and a single patched corner both get sealed, and the size of the job never determines whether that coat is included. Your written estimate comes out of a free on-site visit and reaches you within 24 hours of it, broken into labor, materials, finish level and anything optional.
What Moves the Optional Painting Line
Four things determine where the painting cost for your room lands. Wall area sets the base, and the price rises when trim and ceilings are included alongside the walls instead of painting the walls alone. The number of coats comes next: a strong or dark color over white primer rarely covers in one pass, so plan on two finish coats for anything deep. Tinting the primer toward your chosen color can bring that back to one, so it is worth asking about before the primer goes on.
An empty room goes faster than one where furniture has to be shifted and re-covered as the crew works around it. A spot touch-in over a single repair also costs less than a corner-to-corner recoat. Compare your own room against those four factors and you will know which direction your price is likely to move before we quote the work.
Free Quote Form
Doing the Painting Yourself
Rolling color onto a sanded, cleaned and primed wall is work most people can handle well over a weekend. The skill and messiest part of the job are already finished by the time we leave, and a paint-ready surface is what we hand you. Painting drywall yourself still means buying the paint, a roller and a brush, but it saves the labor, which makes up most of the painting price. Hiring it out buys you speed and clean cut-in lines where the wall meets the ceiling and trim, which is the part of brush work that takes practice.
Tell us which rooms you are considering at (346) 248-4075, or send the details through our quote form, and the on-site visit that produces your itemized estimate is free.
From the Last Sanding to the First Coat of Primer
Five things happen between the moment the sanding block comes off your wall and the moment you choose a color, and the drywall priming process follows them in a fixed order because each step depends on the one before it. Knowing that order tells you what our crew is doing on any given day, how long the quiet stretches will last, and when the job comes back to you for a decision.
-
We Finish the Sanding and Read the Wall
The final sanding pass takes the filled seams and screw holes down flush with the board around them, and then we check the surface under a raking light before we accept it. Whatever shows up gets corrected while the wall is still open: a ridge knocked down, a hollow filled and left to dry. Nothing is sealed until that check is done.
-
The Room Is Cleaned Down
We vacuum the walls with a high-efficiency filtered vacuum, the kind that traps the fine dust instead of blowing it back into the room, and follow with a damp wipe, working top to bottom so nothing we lift settles on a surface we have already cleaned. Floors and horizontal surfaces come next, once the walls have stopped shedding. The barriers come down last, after the room behind them is clean, and the clean-down finishes the same day the sanding does.
-
We Wait for the Compound, Then Prime
Then nothing visible happens for a day or two while the compound gives up its water, and in heavy August air that wait stretches further. We put that wait on the schedule before the job starts, so it is a planned step rather than a delay you hear about afterward. When the wall is dry through, the primer named on your estimate goes on, and on new board that is usually PVA primer.
-
We Walk the Primed Wall With You
Once the primer is dry we walk the room with you under the same low, angled light we used before sealing. A primed wall is the last point at which the board and the compound underneath are still readable; color covers the surface and hides what it is sitting on. Your acceptance at that walkthrough is the record of what you received at this stage.
-
You Decide Where the Job Stops
At that point you tell us whether to carry on into the finish coats priced as an optional line on your estimate, or to hand the room over primed. Both endings were priced before we started, so whichever you pick, the figure was already in front of you and nothing is added at the end. A wall handed over primed is a completed paint-ready surface, ready for whoever rolls the color.
The Woodlands Drywall Co. will price both options from a single visit. Reach us at (346) 248-4075, or describe the rooms in our quote form, and we will come out to look at the walls.
Surfaces That Need More Than PVA Drywall Primer
PVA primer is made for one situation: new gypsum board and the fresh compound spread over its seams. On anything else, its job is finished. It is formulated for new board, so it will not hold back a stain or grip a surface that a coating cannot sink into; those are the jobs of stain-blocking primer and bonding primer. That means the first question on an older wall is not how many coats of drywall primer it needs, but which sealer the wall in front of you actually requires. If your walls have been painted, papered or marked before, the cases below are the ones you are most likely to have.
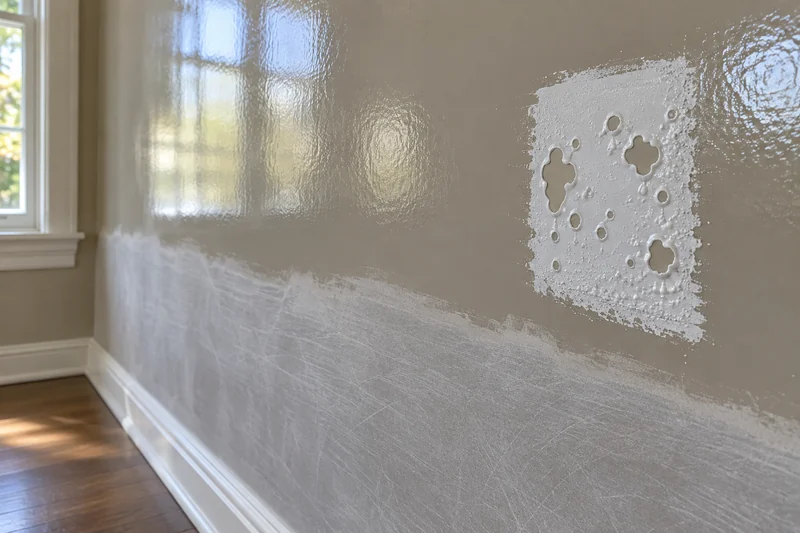
Stains, Marker and Anything That Bleeds Through
Bleed-through happens when a discoloration dissolves into the wet coat applied over it and rises back to the surface as that coat dries. Each new layer picks up a little more of the stain, so a brown water mark can still show through three coats of white paint. The usual causes are water staining, marker and crayon, nicotine from years of smoke, and tannin, the natural brown coloring that seeps out of wood.
A stain-blocking primer seals these discolorations in so nothing travels up through the finish, and a shellac-based primer, which uses a resin barrier rather than water to seal, handles the heaviest stains. PVA does not stop any of them. When the stain came from a leak, our water damage service addresses the source and the wet board before any sealer goes on.
Glossy Paint, Old Walls and Wallpaper Paste
A wall already coated with gloss or oil-based paint is too closed for PVA to grip properly, so we scuff the surface and apply a bonding primer made to hold onto a slick finish. On an old or chalky wall that has been patched before, bare compound and aged paint absorb coatings at different rates, so sealing only the repaired areas often serves you better than priming the entire wall. A wall stripped of wallpaper still carries paste, and our wallpaper removal service removes both the paper and the residue. Nothing is sealed until that wall is clean.
Free Quote Form
Priming and Paint Prep Across The Woodlands, Montgomery and Harris Counties
Drywall priming in The Woodlands follows a Gulf Coast calendar. Between the humidity and summer highs near 94 degrees Fahrenheit, a coat here needs more drying time than the same coat would in a dry market, so we plan the visits around those conditions instead of fighting them. The same applies whether your house is in one of the villages or out past the county line.
The Woodlands Drywall Co. primes and preps walls across 21 locations, including the villages within The Woodlands and the surrounding towns throughout Montgomery County:
The Woodlands Drywall Co. Primes and Preps Walls Across These Communities
Villages of The Woodlands:
- Alden Bridge
- Cochran’s Crossing
- College Park
- Creekside Park
- Grogan’s Mill
- Indian Springs
- Panther Creek
- Sterling Ridge
And the surrounding communities:
- Conroe
- Atascocita
- Spring
- Porter
- New Caney
- Humble
- Kingwood
- Tomball
- Willis
- Pinehurst
- Shenandoah
- Oak Ridge North
- Magnolia
Priming and Painting Questions
Is it necessary to sand drywall before painting?
Yes, every time. What gets sanded is more limited than most people picture: the bands of compound over the seams and the small filled spots covering the screw and nail heads, not the entire face of the board. The board face arrives from the factory already smooth, so heavy sanding across it tears the paper nap and causes more harm than good. Before anything is applied, all dust from the sanding has to be removed.
Is it cheaper to paint yourself or hire a painter?
Doing it yourself is cheaper, and almost all of the savings come from labor. A gallon of paint costs the same whether you buy it or a painter does, so the material cost does not drop when you take over the work. What you need instead is a roller, a brush for the edges, and the time to work your way around the room.
Is priming included in the price, or is it extra?
It is included on both repairs and new installations. A wall is not finished simply because the compound is smooth; it is finished when the surface is ready to take color evenly. Billing you separately for priming would mean quoting half the job and calling it complete.
Why does my wall look patchy after it was painted?
The seams and the board face absorbed the paint at different rates, so the color now sits at different sheen depths across the same flat wall. The repair is to prime the entire wall over the existing color and then repaint it, which evens out the surface the finish coat is sitting on. A third or fourth coat of color will not fix it, because each new coat still meets the same uneven surface underneath and repeats the pattern.
How long does new drywall have to dry before it can be primed?
Usually one to two days after the final compound coat goes on, and longer when the air in the house is heavy. You do not have to rely on the clock alone, because the compound shows you where it is in the drying process. While moisture is still present, it looks darker in patches and feels cool against the back of your hand. As the water leaves, the entire filled area settles to one even shade.
Does paint-and-primer-in-one work on new drywall?
Not as a replacement for primer on bare board. A combination product is a finish paint formulated to seal better than most finish paints, which is different from a sealer made to soak into an open surface. It earns its place on a wall that is already sealed or has been painted before. It also costs more per gallon than PVA primer, so using it on raw board means paying more for less effective sealing.
Ask The Woodlands Drywall Co. What Your Job Includes
One question separates a clear drywall priming and painting price from a vague one: where does the work you are paying for stop? You already know that answer with The Woodlands Drywall Co., and your written estimate will spell it out the same way. To find out where your own walls land, call us at (346) 248-4075, or describe the rooms in the quote form. The on-site visit costs you nothing.